
CloudFlare解析一个域名,别打开Proxy

一键脚本
wget -N --no-check-certificate -q -O install.sh "https://raw.githubusercontent.com/wulabing/V2Ray_ws-tls_bash_onekey/master/install.sh" && chmod +x install.sh && bash install.sh
先选11,装好bbr
再选1 – 然后按提示一步步来就行了,准备好已经解析但未打开Proxy的域名,建议选择443端口,TLS 选1.3安全性最高。
当然这些也可以时候修改。
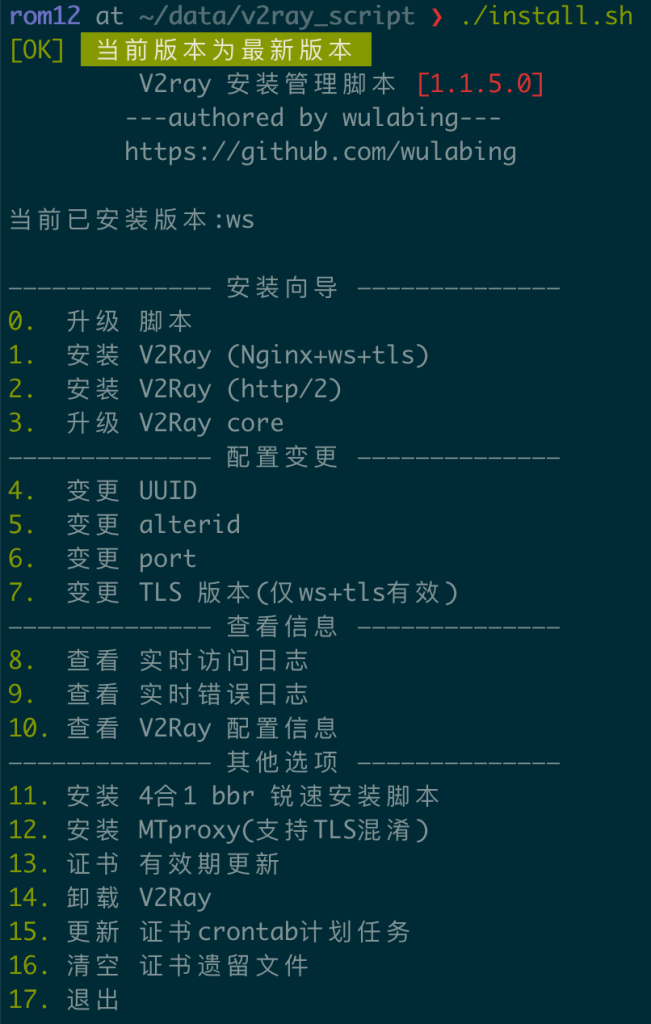

最后生成 – 扫描添加即可
# 人工的配置如下

- name: "v2_xxx"
  type: vmess
  server: xx.yy.zz
  port: 443
  uuid: YOUR-OWN-VALID-UUID
  alterId: 2
  cipher: auto
  tls: true
  network: ws #如果选了h2,就填h2
  ws-headers:
    Host: xx.yy.zz
  ws-path: /v2ray/022123cc/
  skip-cert-verify: true     #默认false
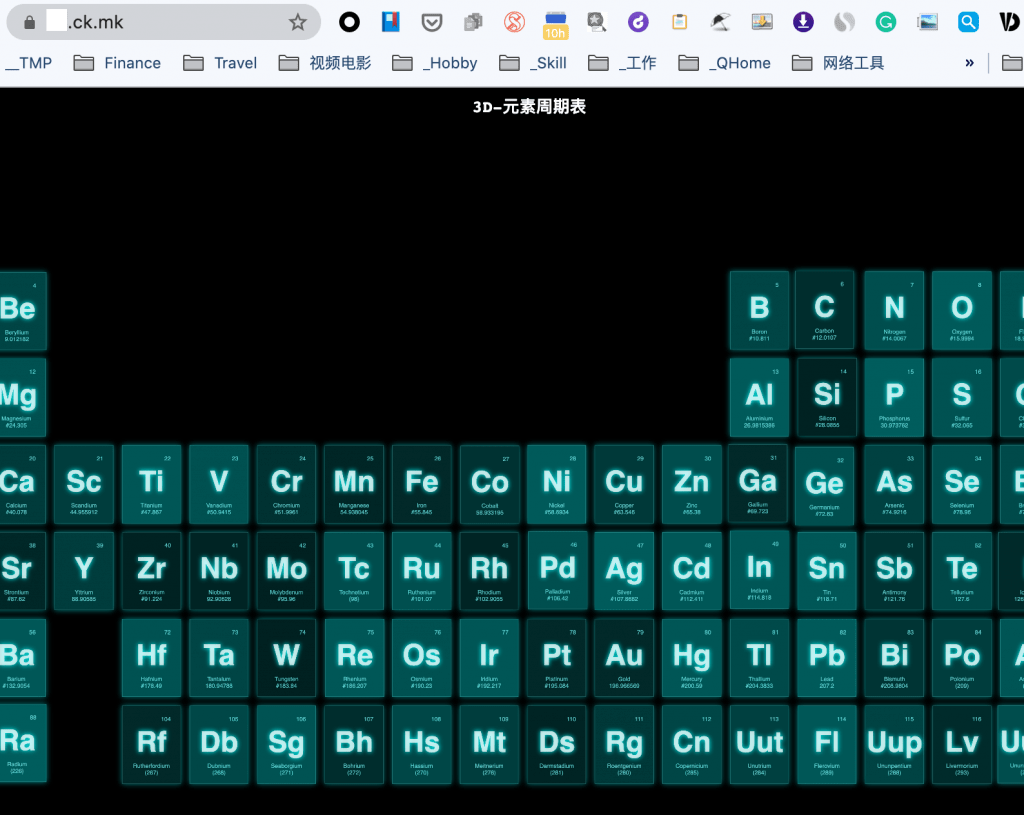
测试一下V2Ray,能翻墙就对了。另外,打开你的 xxx.ck.mk之类的,要看到伪装网站。
打开CloudFlare Proxy加速

CF Proxy On v.s Off
比较一下我的hostsolutions 罗马尼亚小鸡,没打开CF Proxy和打开后的差别
提速将近20倍。
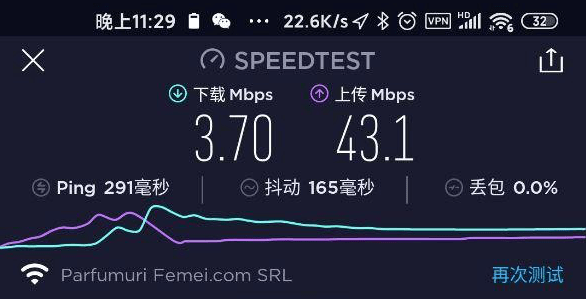
No Proxy 
After Proxy
重要命令和路径
systemctl start v2ray #启动 V2ray
systemctl stop v2ray #停止 V2ray
systemctl start nginx #启动 Nginx
systemctl stop nginx #停止 Nginx

# 伪装的 Web 目录
ls -l /home/wwwroot/3DCEList
# V2ray 服务端配置:
ls -l /etc/v2ray/config.json
# Nginx 目录:
ls -l /etc/nginx
# 证书文件:
ls -l /data/v2ray.key /data/v2ray.crt