Contents
hide
DD Win
- 参考了 https://520.be/
但上面的一些命令还是有些问题,本文做了修正
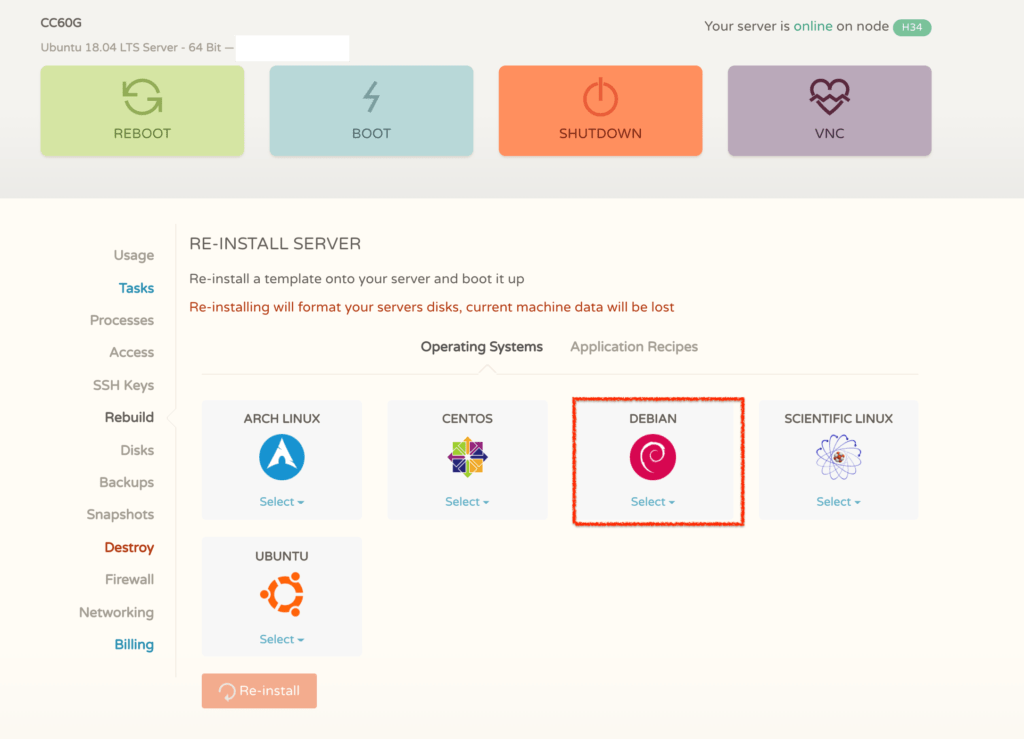
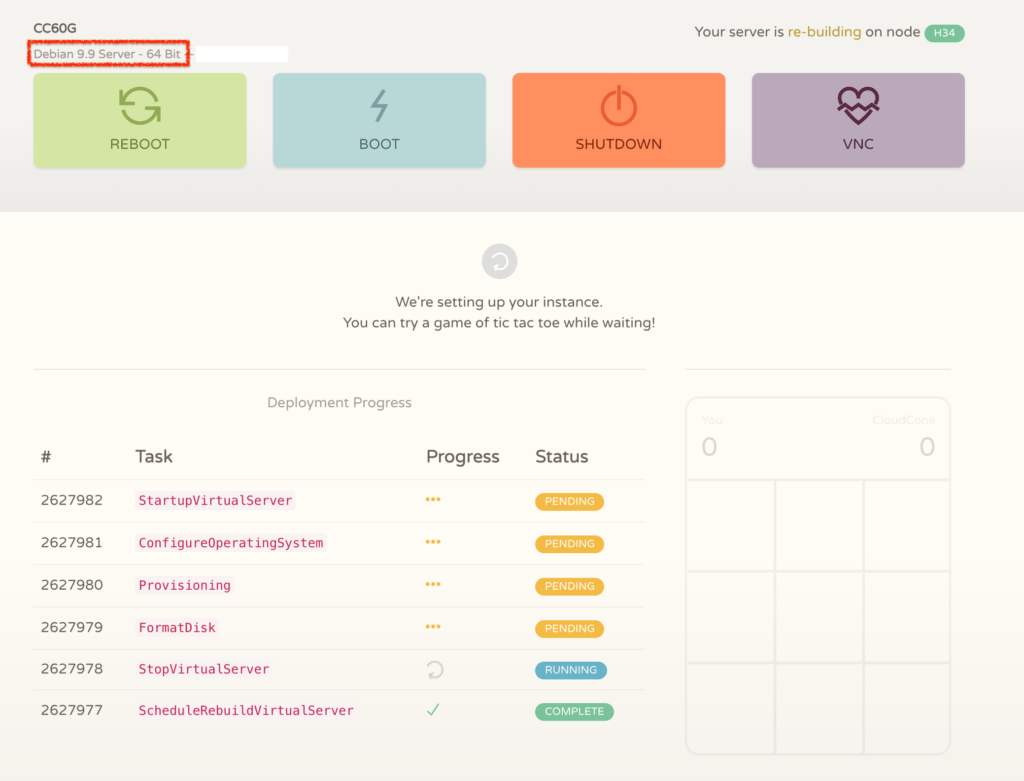
搞成debian 9.9
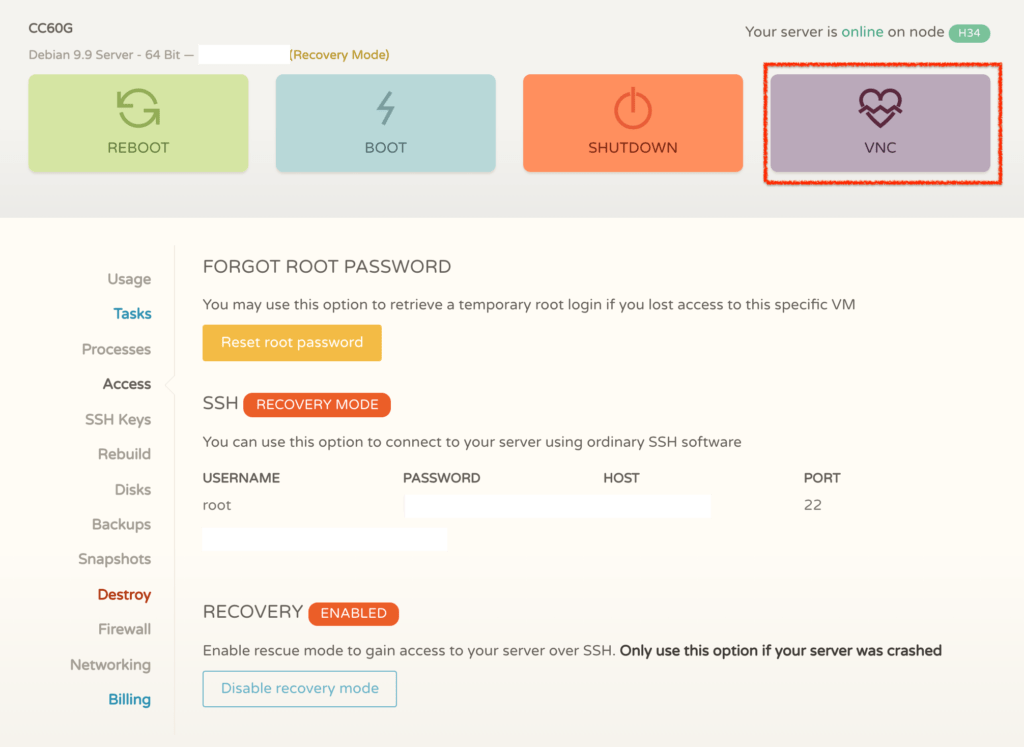
启动救援模式(Recovery Mode) – 记住密码
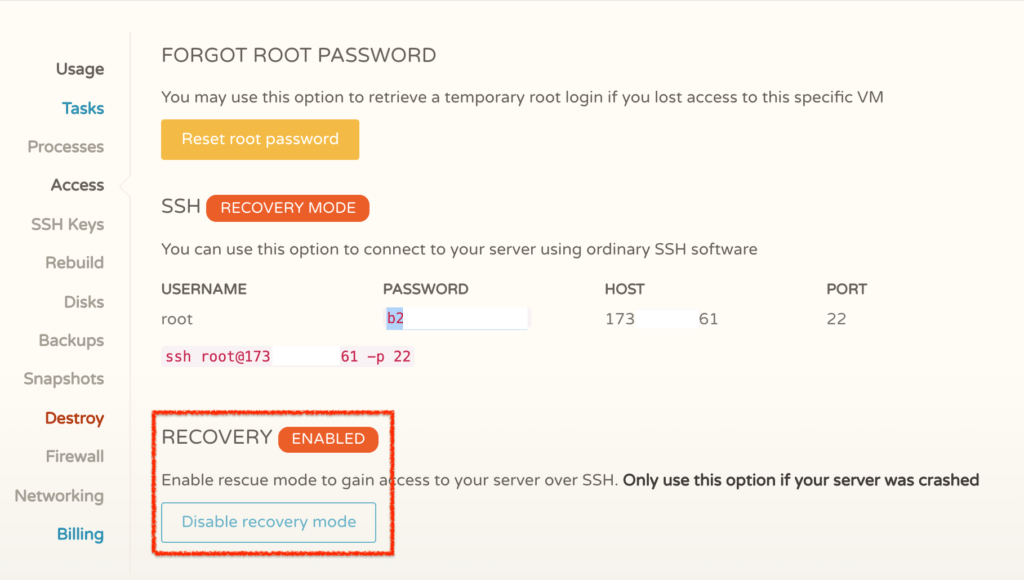
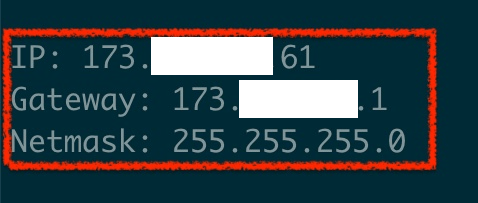
找到对的 IP/Netmask/Gateway
通过VNC进入到救援模式当中
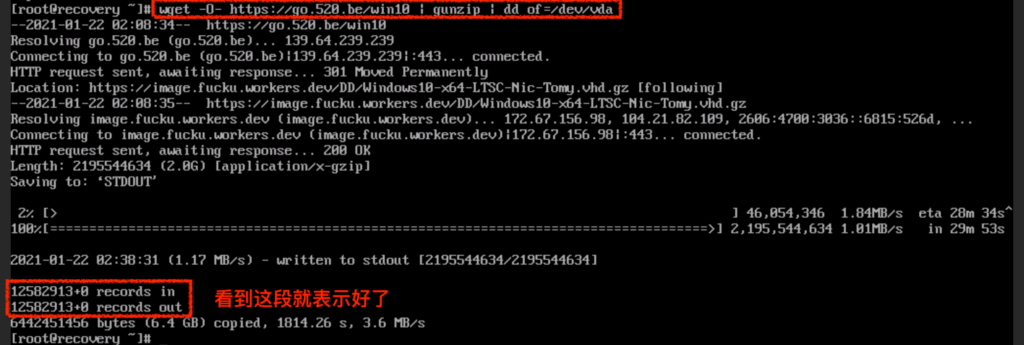
进入后,输入root和对应的密码,然后输入dd命令
wget -O- https://go.520.be/win10 | gunzip | dd of=/dev/vda等待直到看到这行
另外一种不需要进入救援模式的dd方法是
bash <(wget --no-check-certificate -qO- 'https://moeclub.org/attachment/LinuxShell/InstallNET.sh') -dd "系统镜像地址"
# "系统镜像地址"
# Windows 7 32位中文(Windows Thin PC):
https://image.moeclub.org/GoogleDrive/1srhylymTjYS-Ky8uLw4R6LCWfAo1F3s7
https://moeclub.org/onedrive/IMAGE/Windows/win7emb_x86.tar.gz
# Windows 8.1 SP1 64位中文(Embedded):
https://image.moeclub.org/GoogleDrive/1cqVl2wSGx92UTdhOxU9pW3wJgmvZMT_J
https://moeclub.org/onedrive/IMAGE/Windows/win8.1emb_x64.tar.gz
# Windows 10 ltsc 64位中文:
https://image.moeclub.org/GoogleDrive/1OVA3t-ZI2arkM4E4gKvofcBN9aoVdneh
https://moeclub.org/onedrive/IMAGE/Windows/win10ltsc_x64.tar.gz
# Just like
bash <(wget --no-check-certificate -qO- 'https://moeclub.org/attachment/LinuxShell/InstallNET.sh') -dd https://image.moeclub.org/GoogleDrive/1OVA3t-ZI2arkM4E4gKvofcBN9aoVdneh
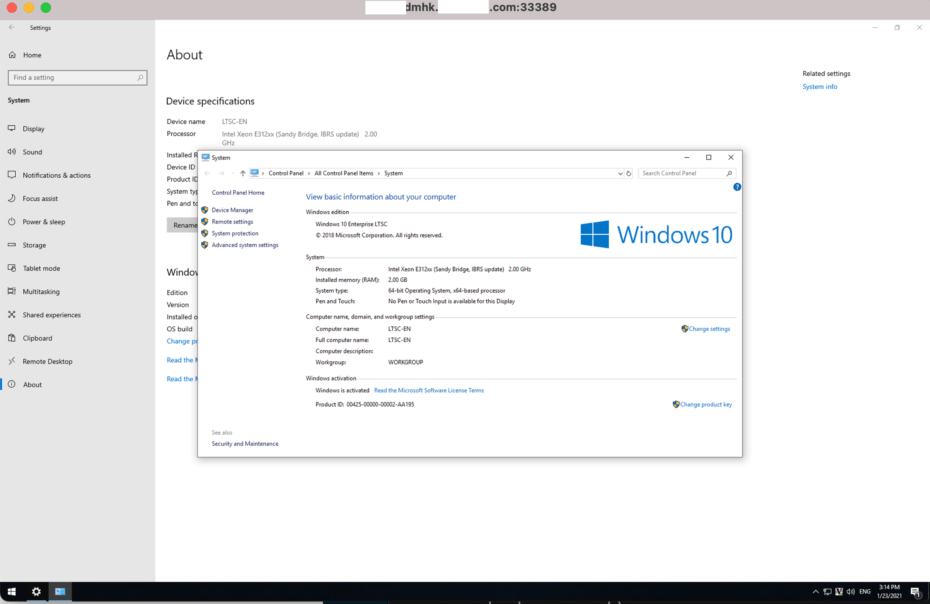
# 默认用户名密码就是 Administrator:Vicer登陆Win 10
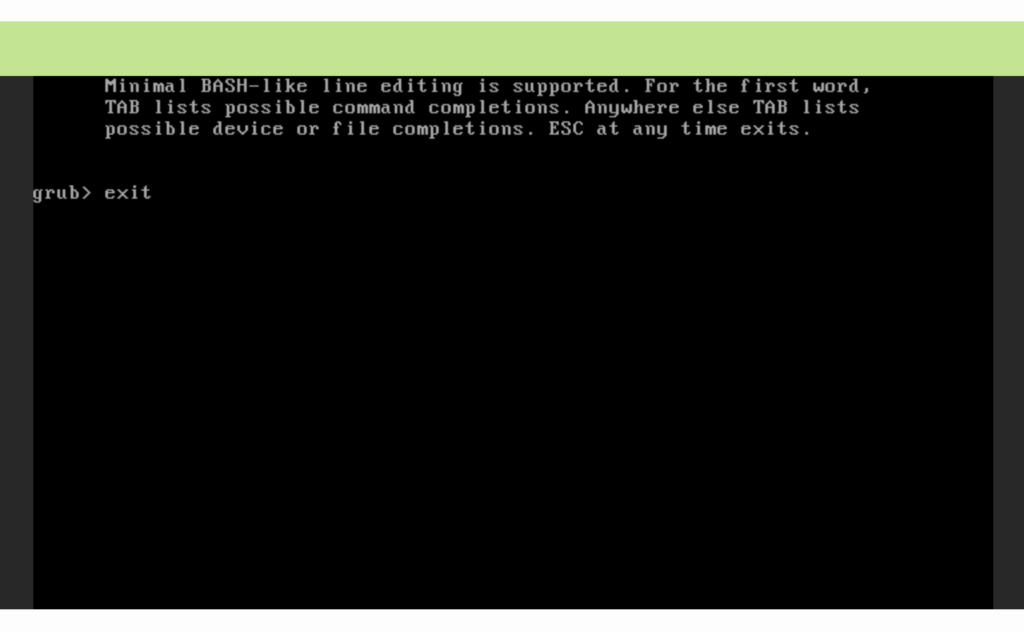
如果VNC登陆,一开始进不去出现Grub界面
则按C键,手动输入exit,正常进入系统

进入之后,一劳永逸的解决这个问题 – 打开cmd之后
mkdir C:\Boot\grub2 && echo chainloader +1 >> C:\Boot\grub2\grub.cfg && echo boot >> C:\Boot\grub2\grub.cfg
还是通过VNC登陆即可 – 用户名 Administrator 初始密码 ievo.top
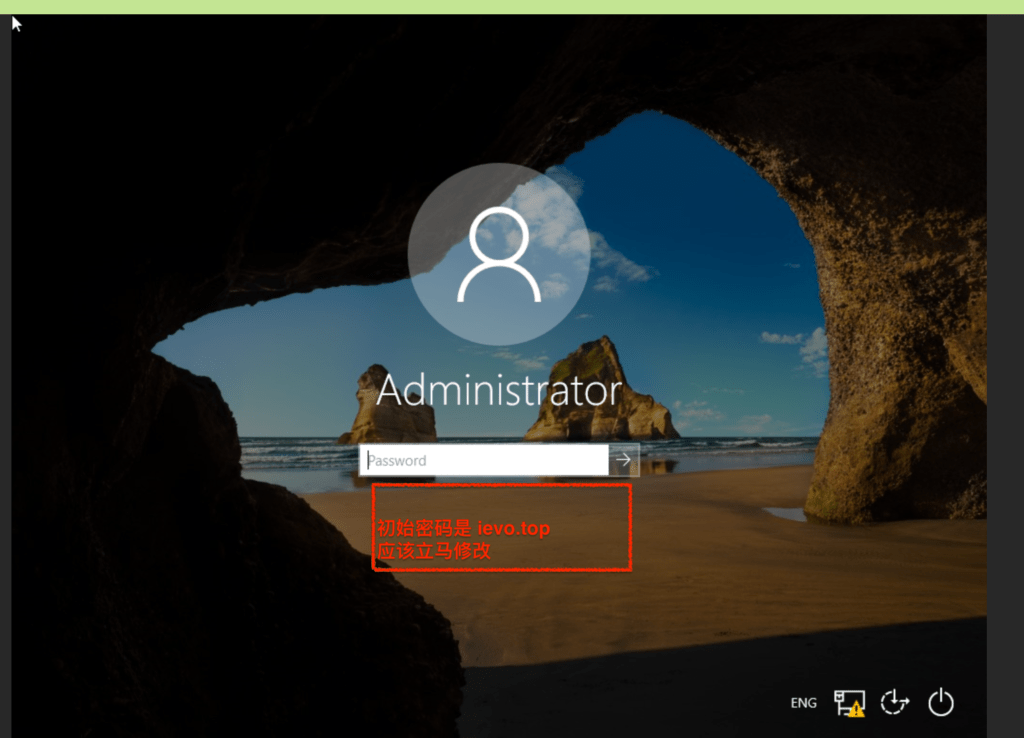
修改密码
通过 Win+R,输入 cmd
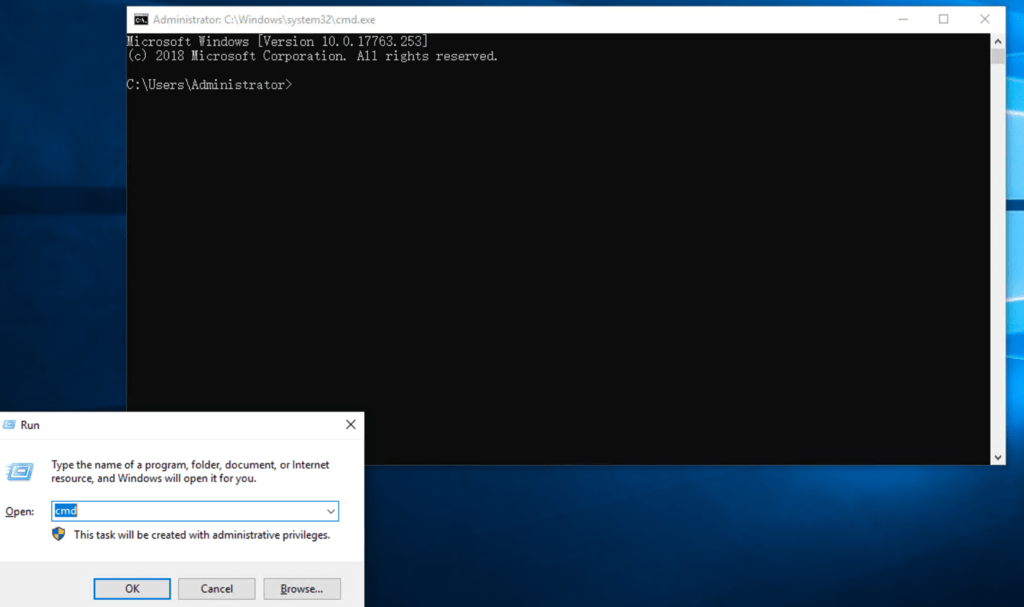
net user Administrator YourNewPassword以后登陆就要用这个新的密码了
设置网络
刚dd完,网络是不同的,需要设置 – 前面拿到了 IP/Netmask/Gateway
输入
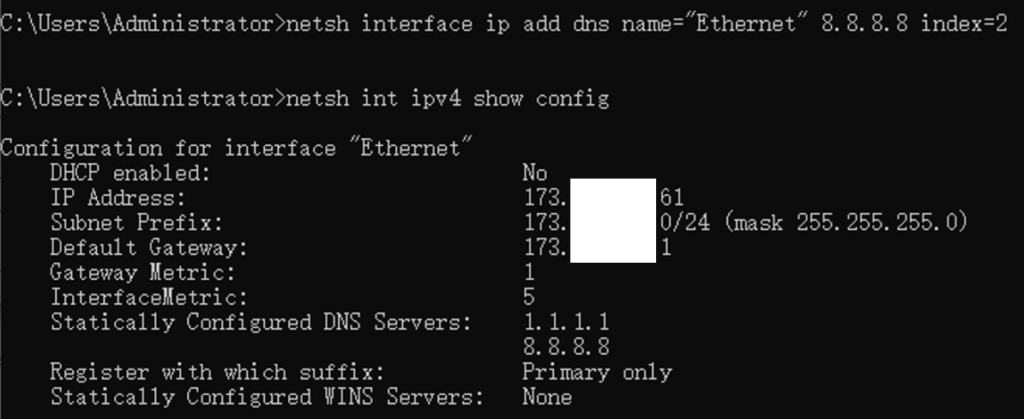
: 显示当前的网络,包括interface names
netsh int ipv4 show config
: 设置网络
netsh ipv4 set address name="Ethernet" static <IP> <Netmask> <Gateway>
ping 1.1.1.1
: 设置DNS
netsh int ipv4 set dns name="Ethernet" static 1.1.1.1
netsh interface ip add dns name="Ethernet" 8.8.8.8 index=2
ping www.google.com

: 如果用DHCP的话
netsh interface ip set address name="Ethernet" dhcp
netsh interface ip set dnsservers name="Ethernet" source=dhcp

此时就可以访问外部网络了
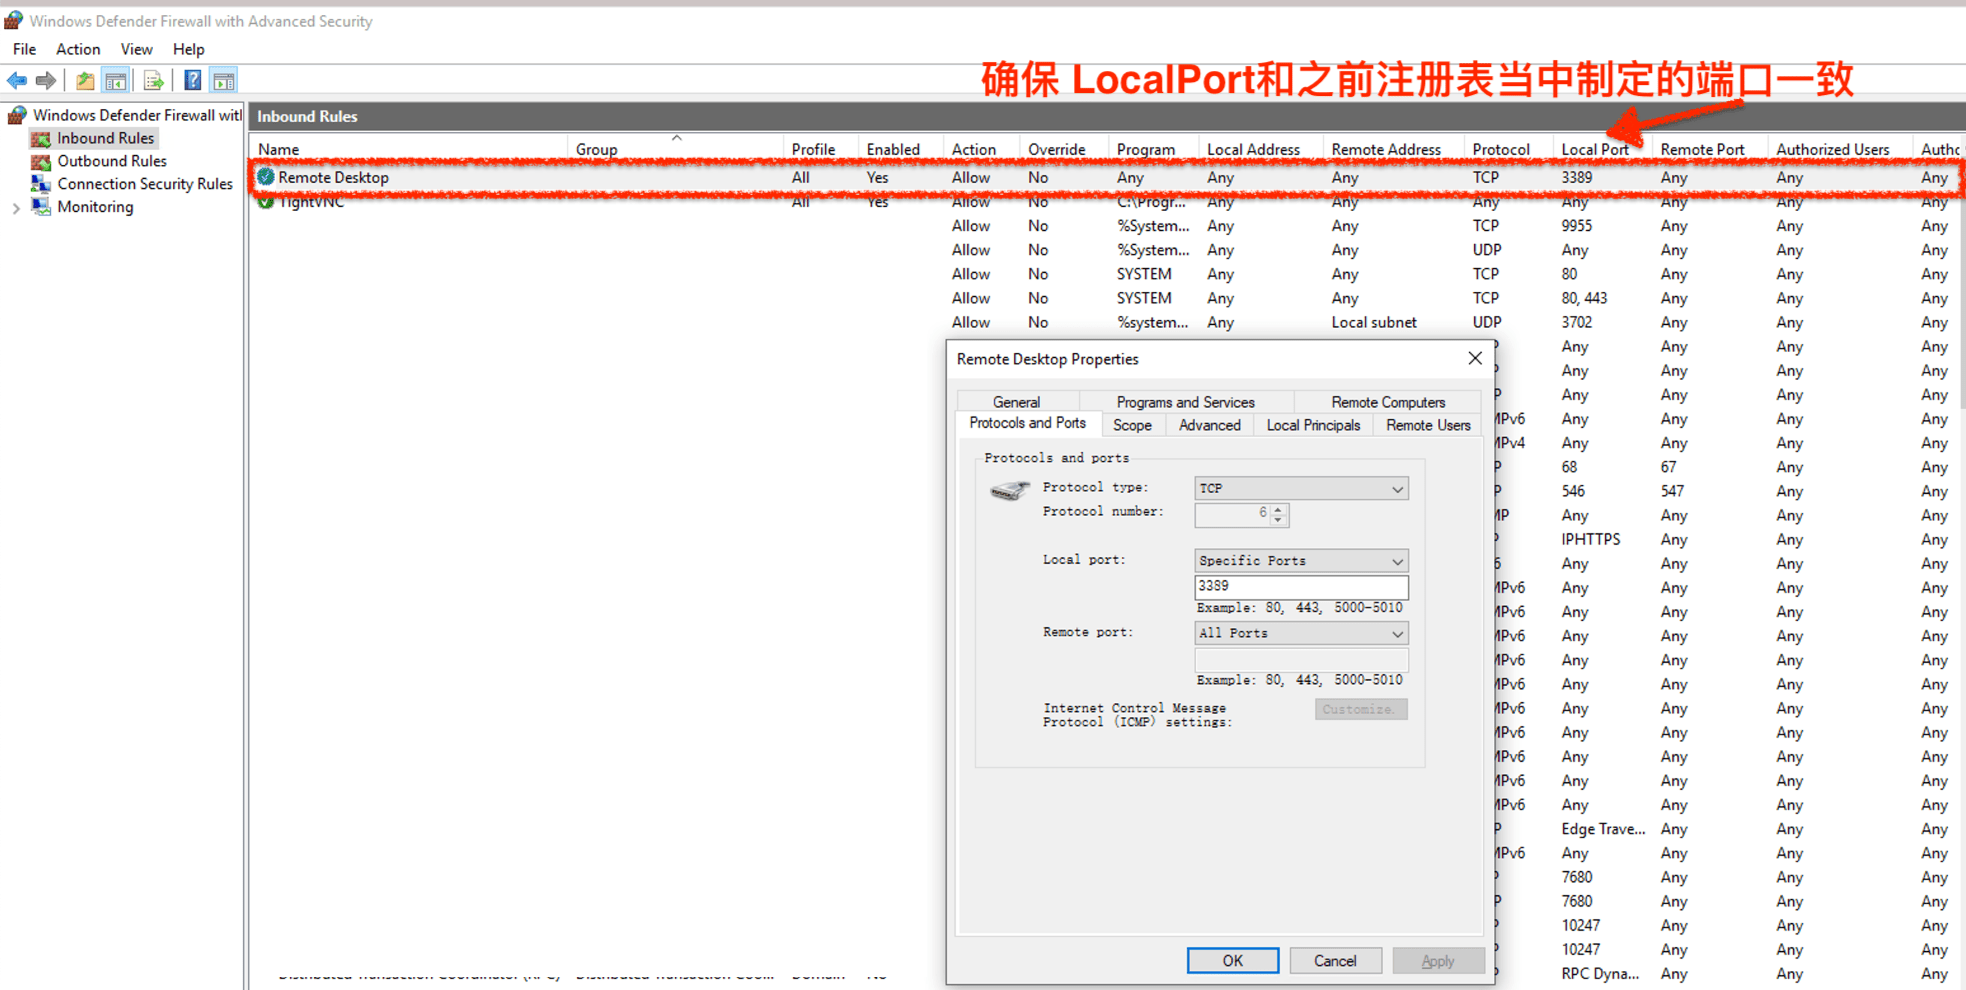
开启Remote Desktop 远程桌面访问
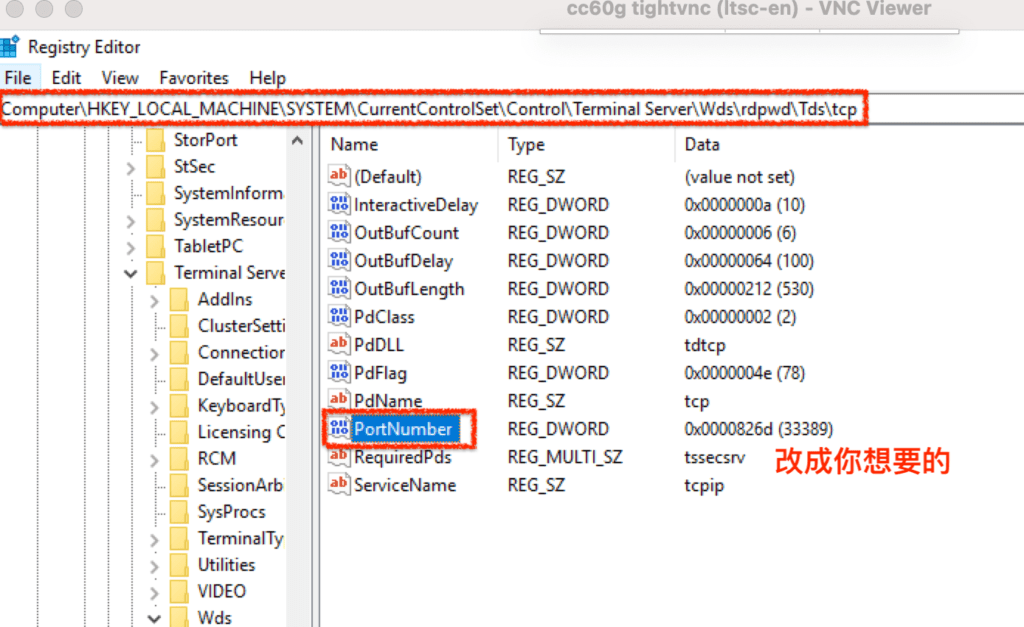
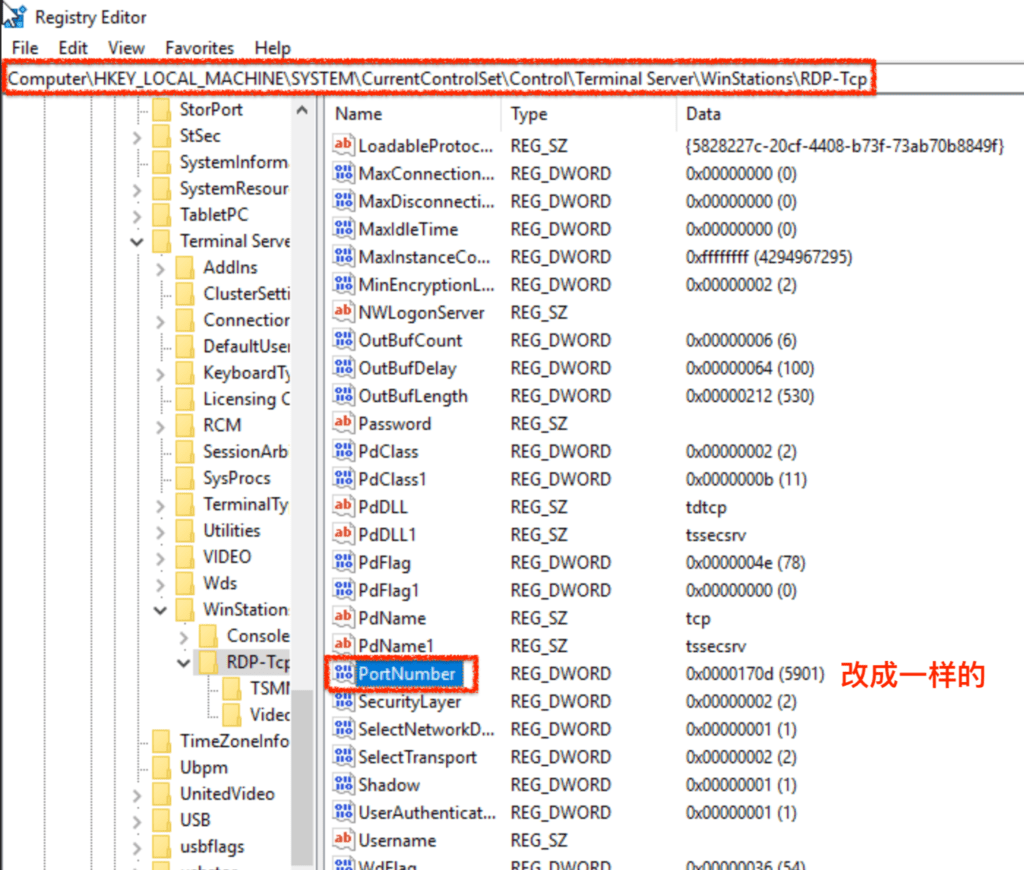
注册表开启端口
两个项都要修改成你想要的端口
- HKEY_LOCAL_MACHINE\SYSTEM\CurrentControlSet\Control\Terminal Server\WinStations\RDP-Tcp
- HKEY_LOCAL_MACHINE\SYSTEM\CurrentControlSet\Control\Terminal Server\Wds\rpdwd\Tds\tcp
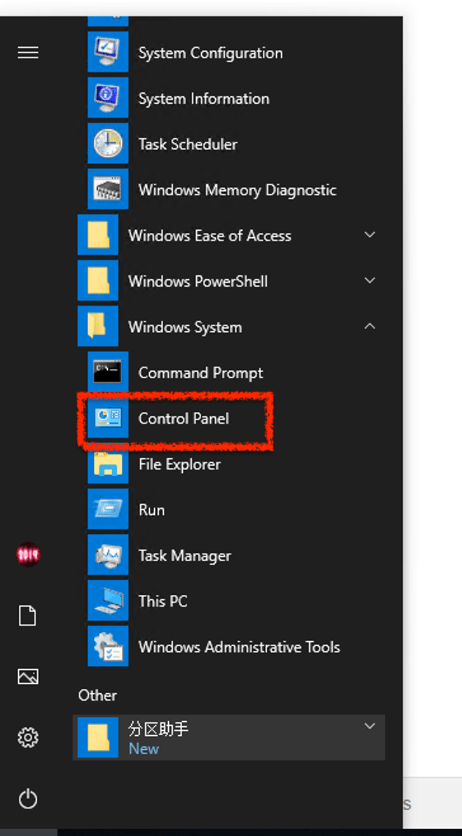
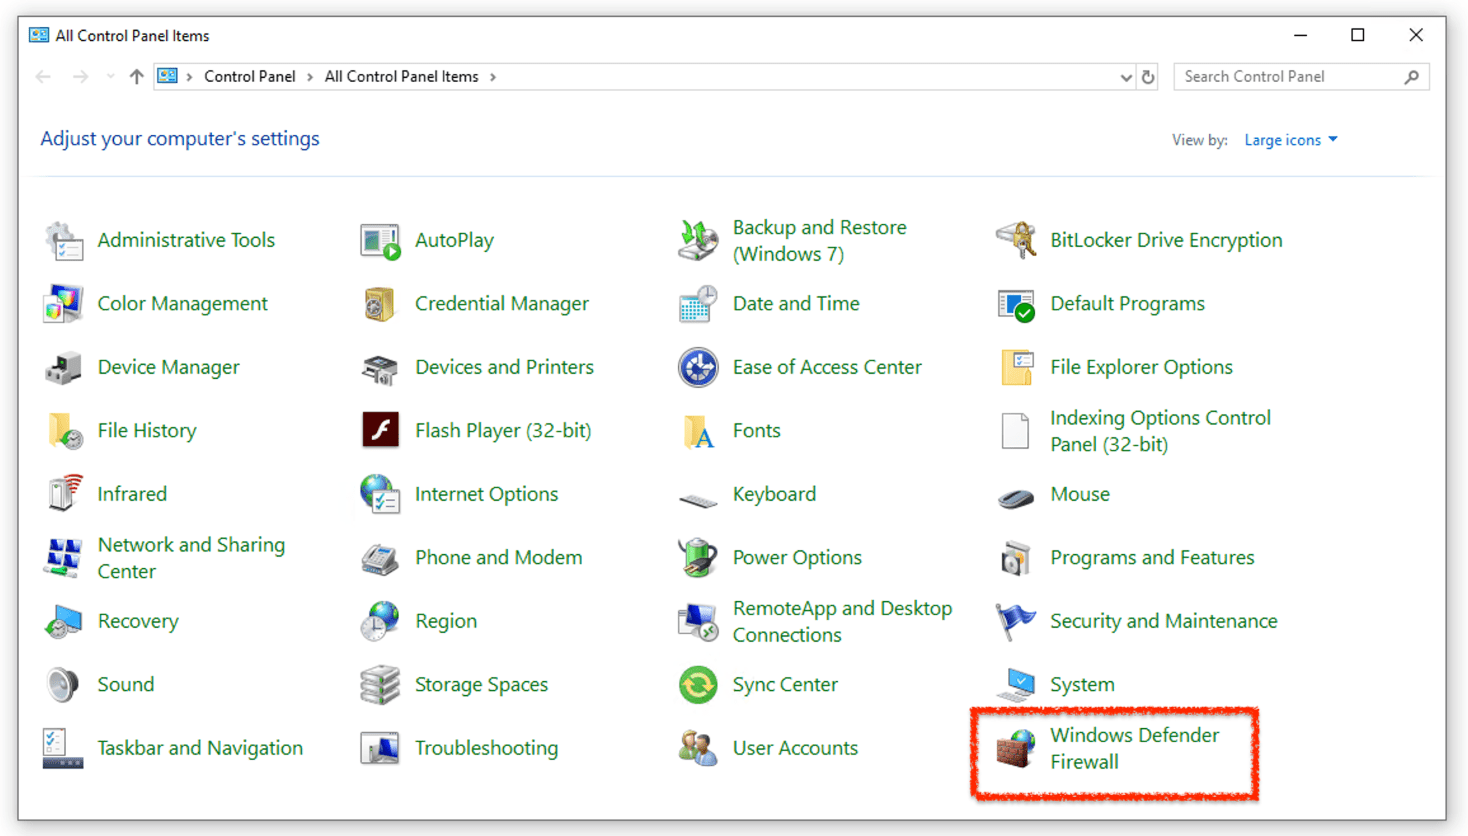
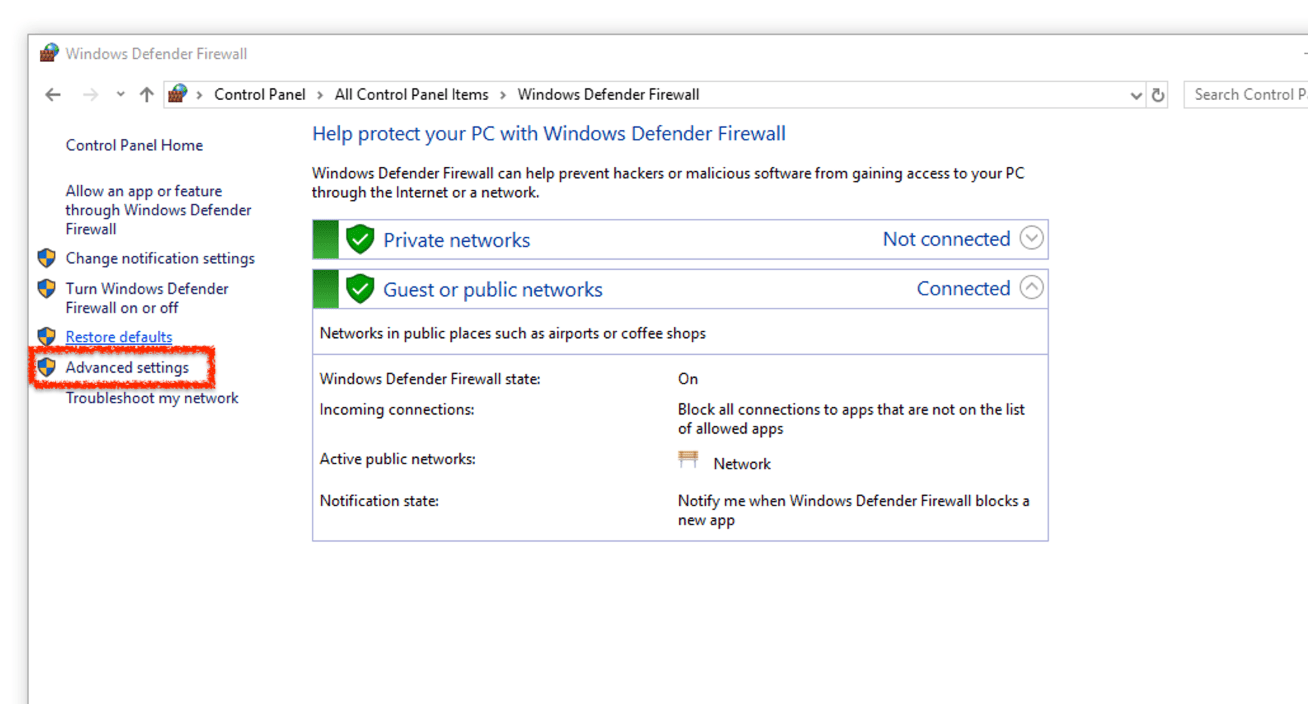
确认防火墙的设置
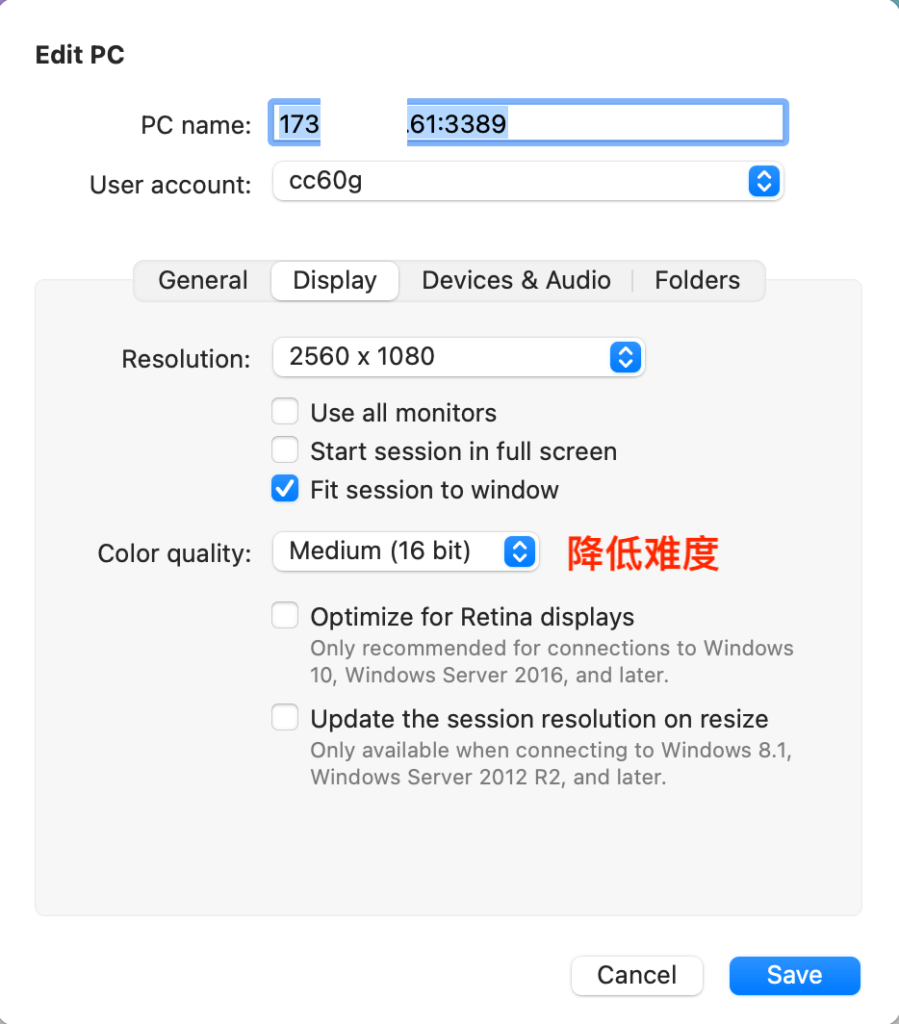
Mac上可以用Microsoft Remote Desktop 来登陆
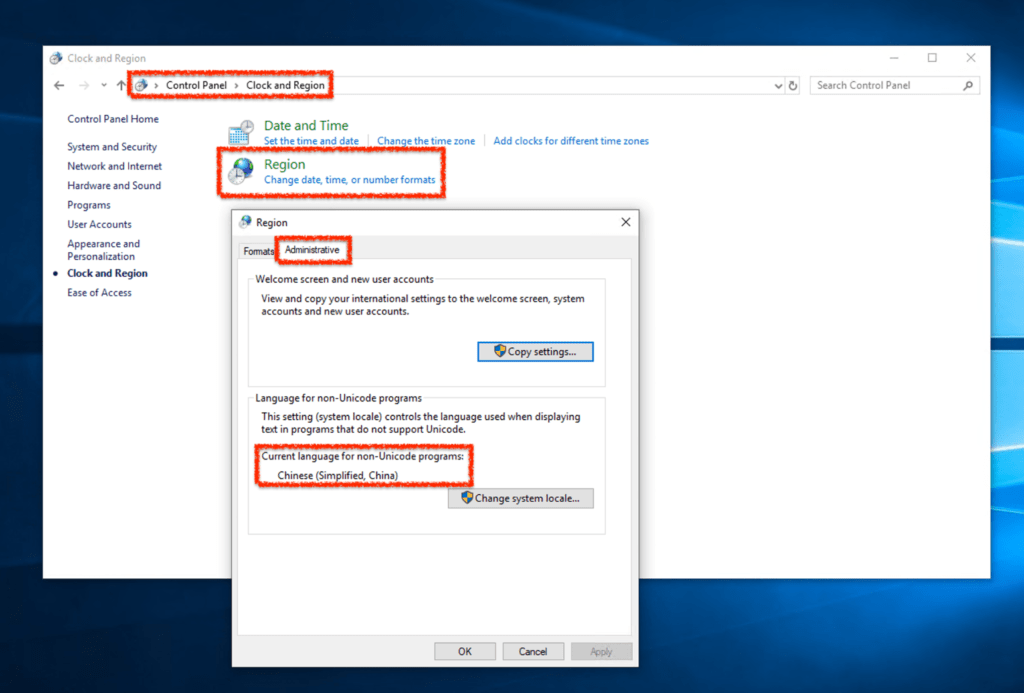
确保中文显示正确
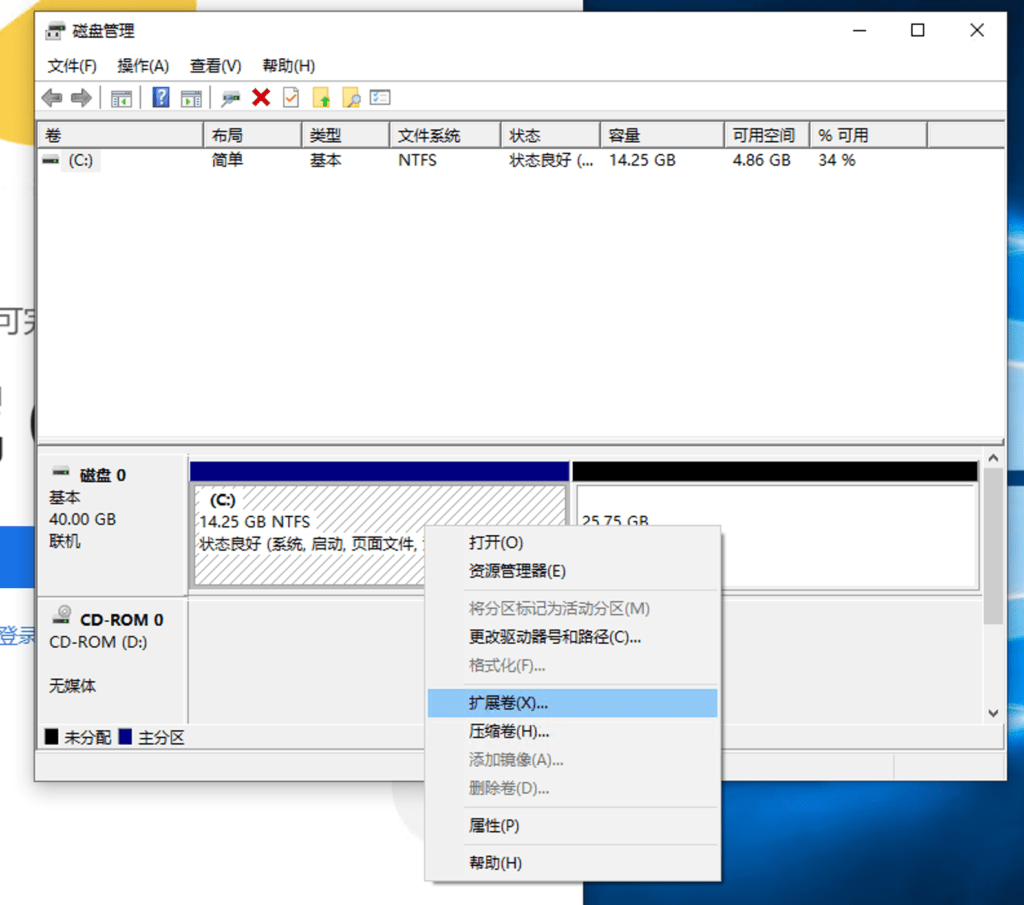
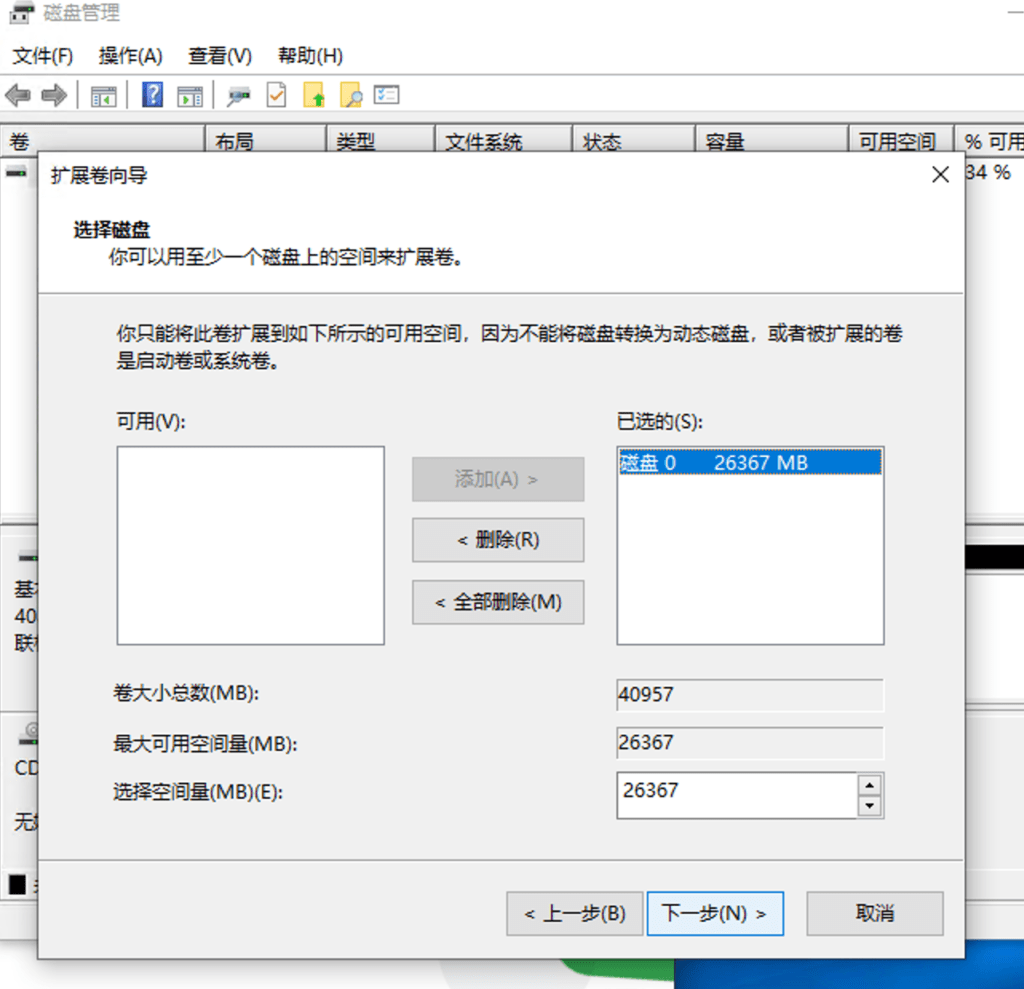
扩展C盘分区
因为这个镜像默认就是6G,所以我的CloudCone的60G硬盘一开始只用了6G。
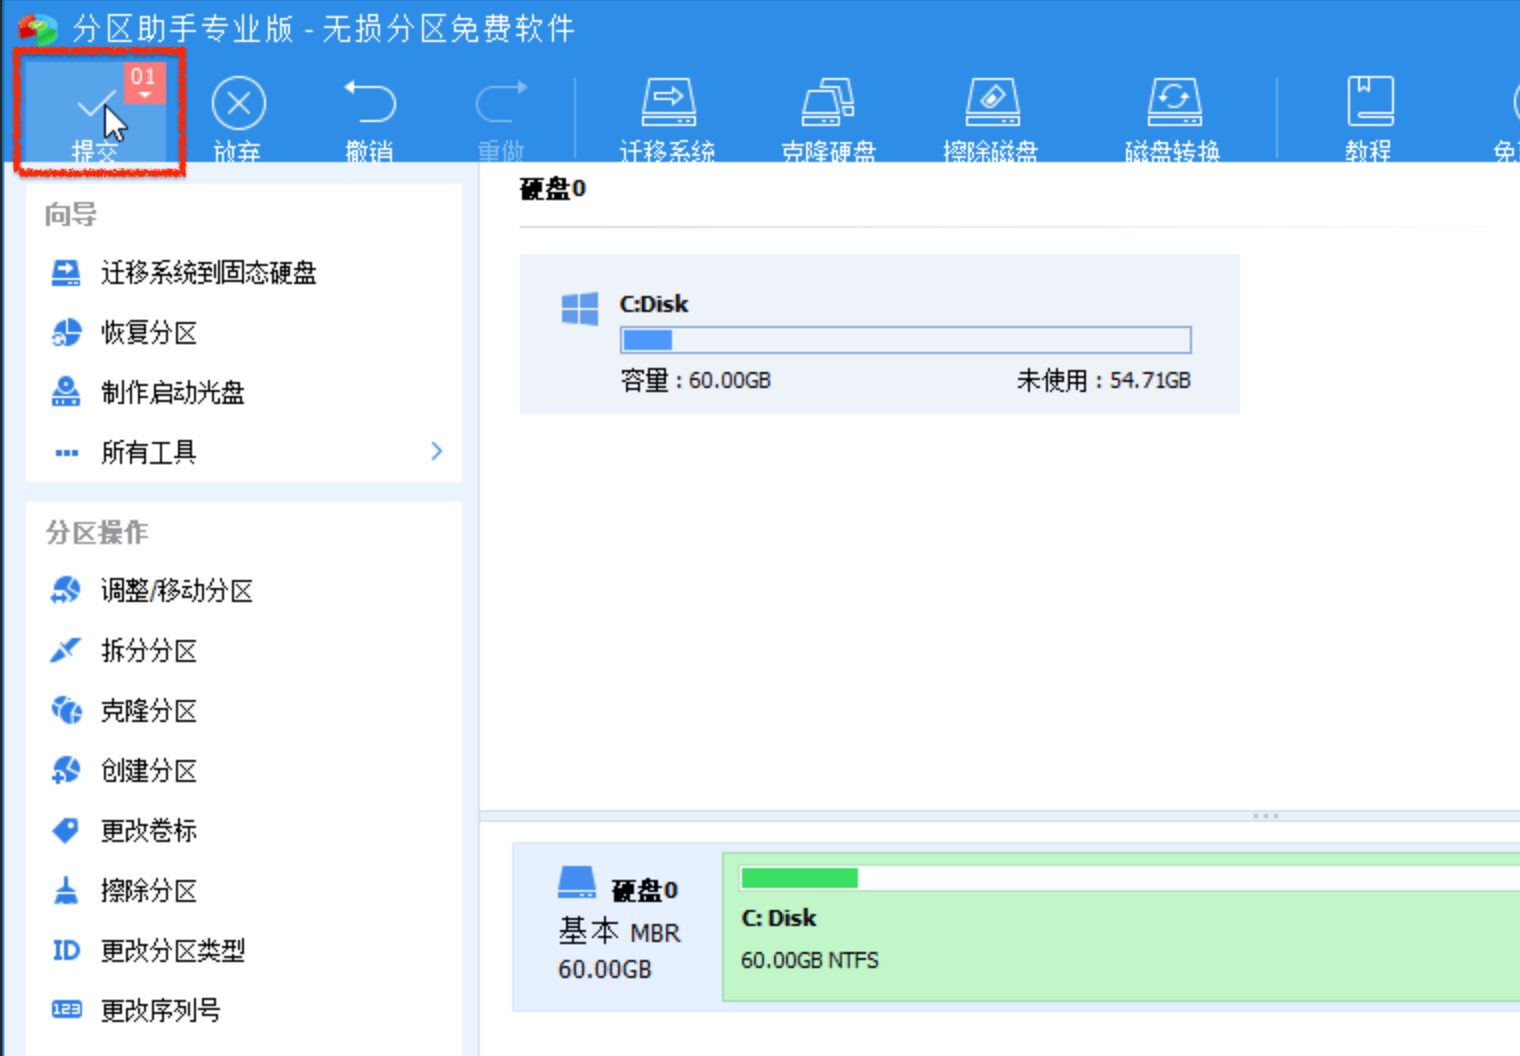
直接用系统自带的磁盘工具来拓展分区

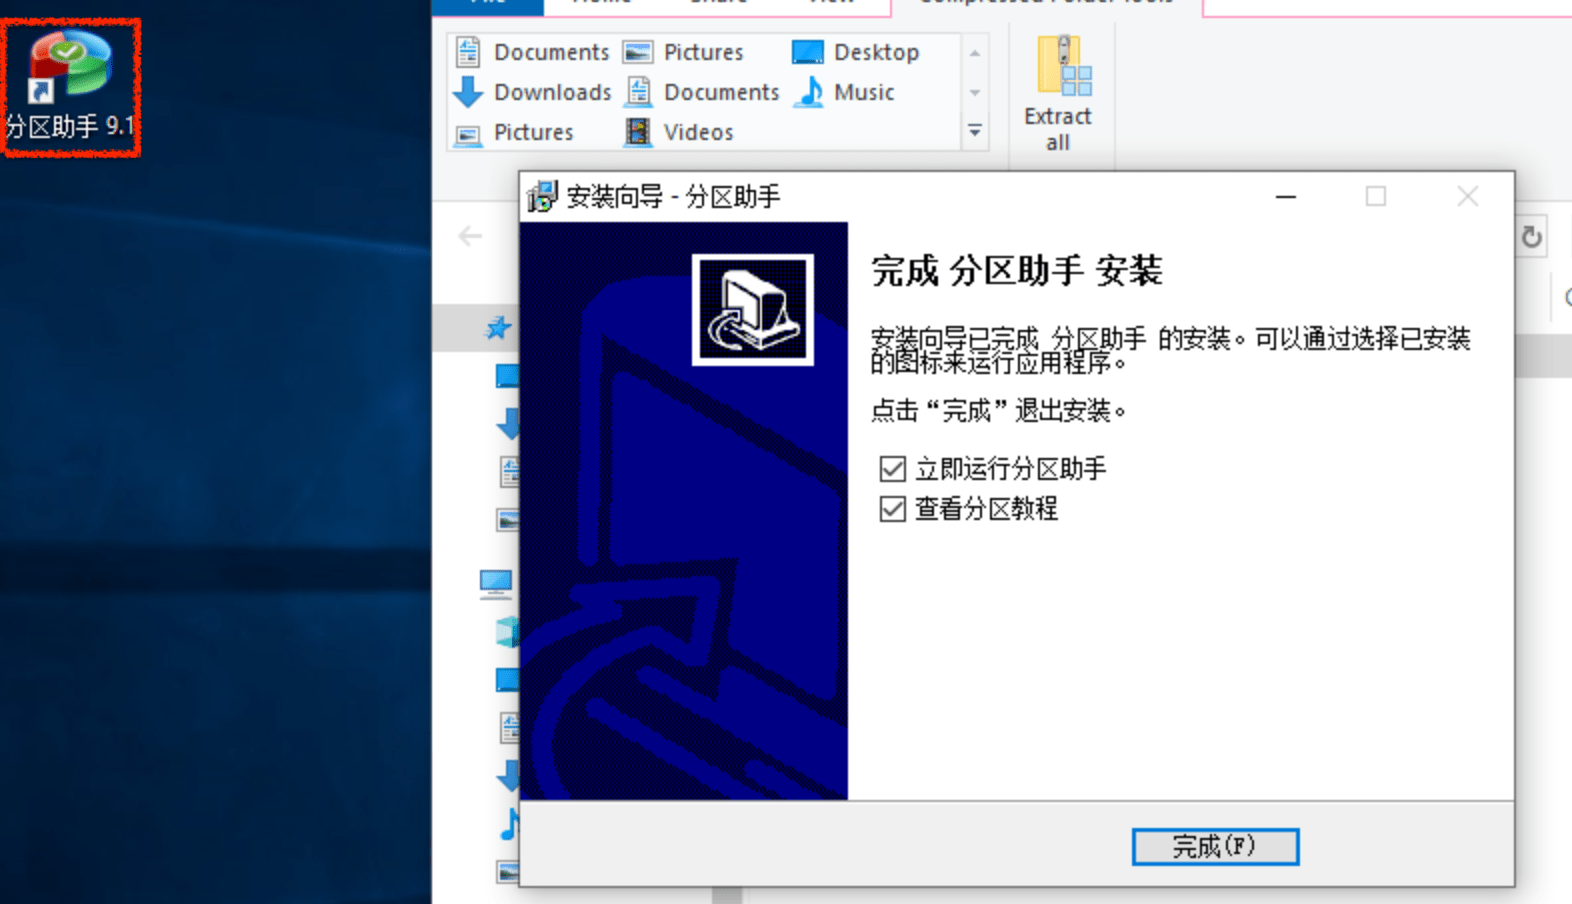
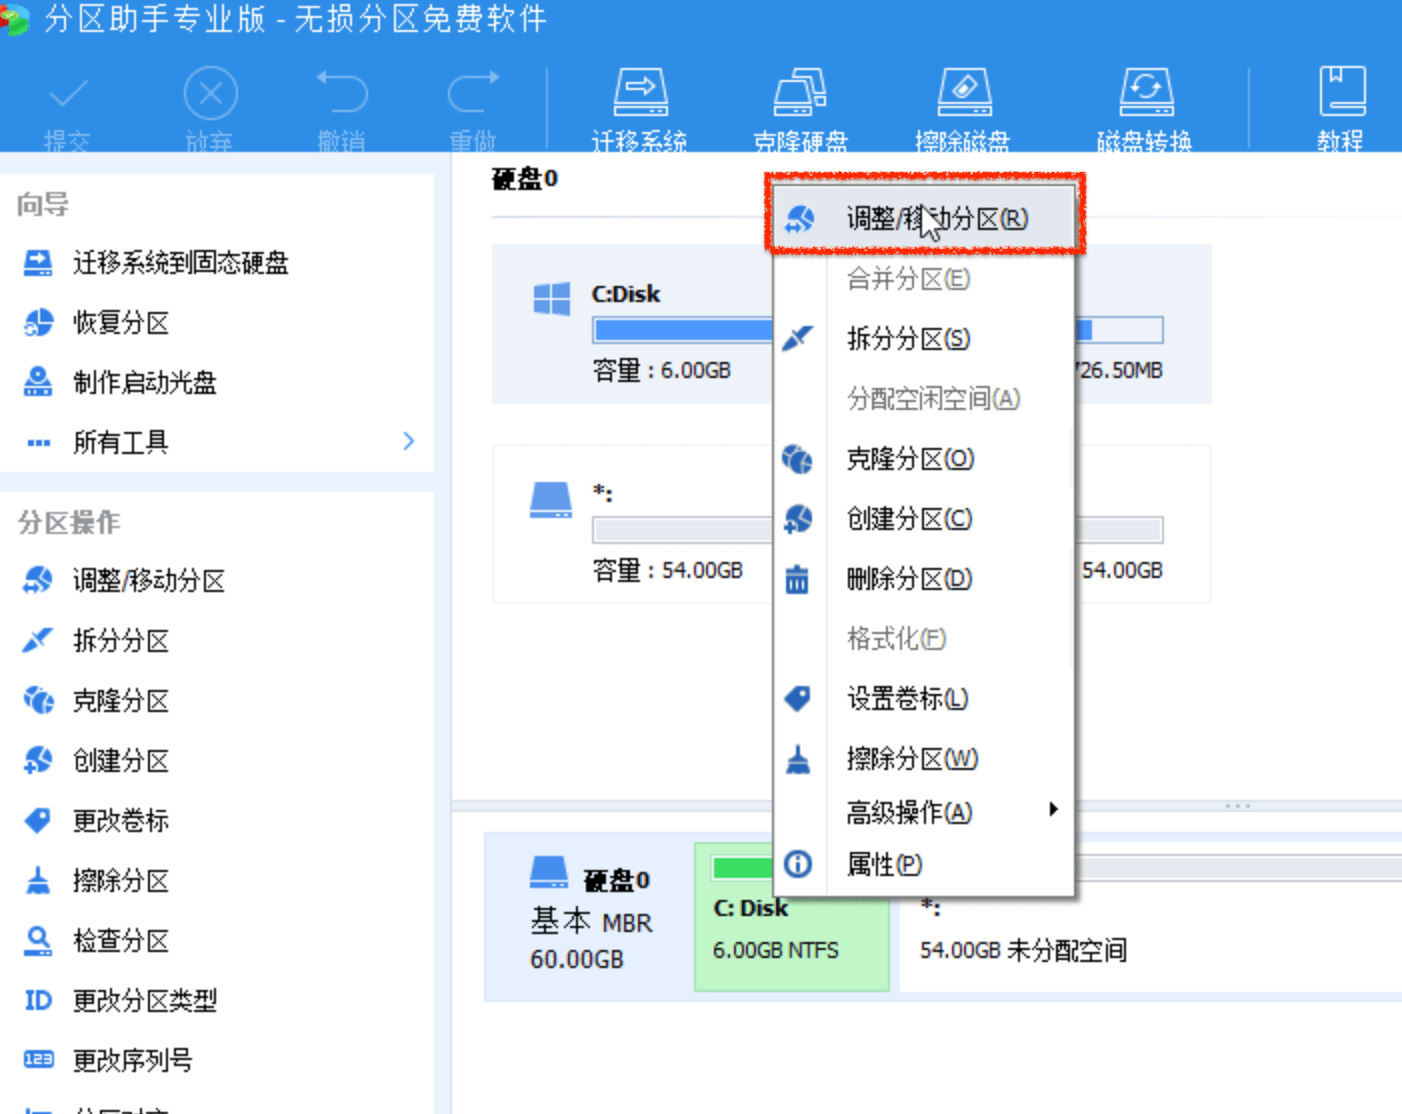
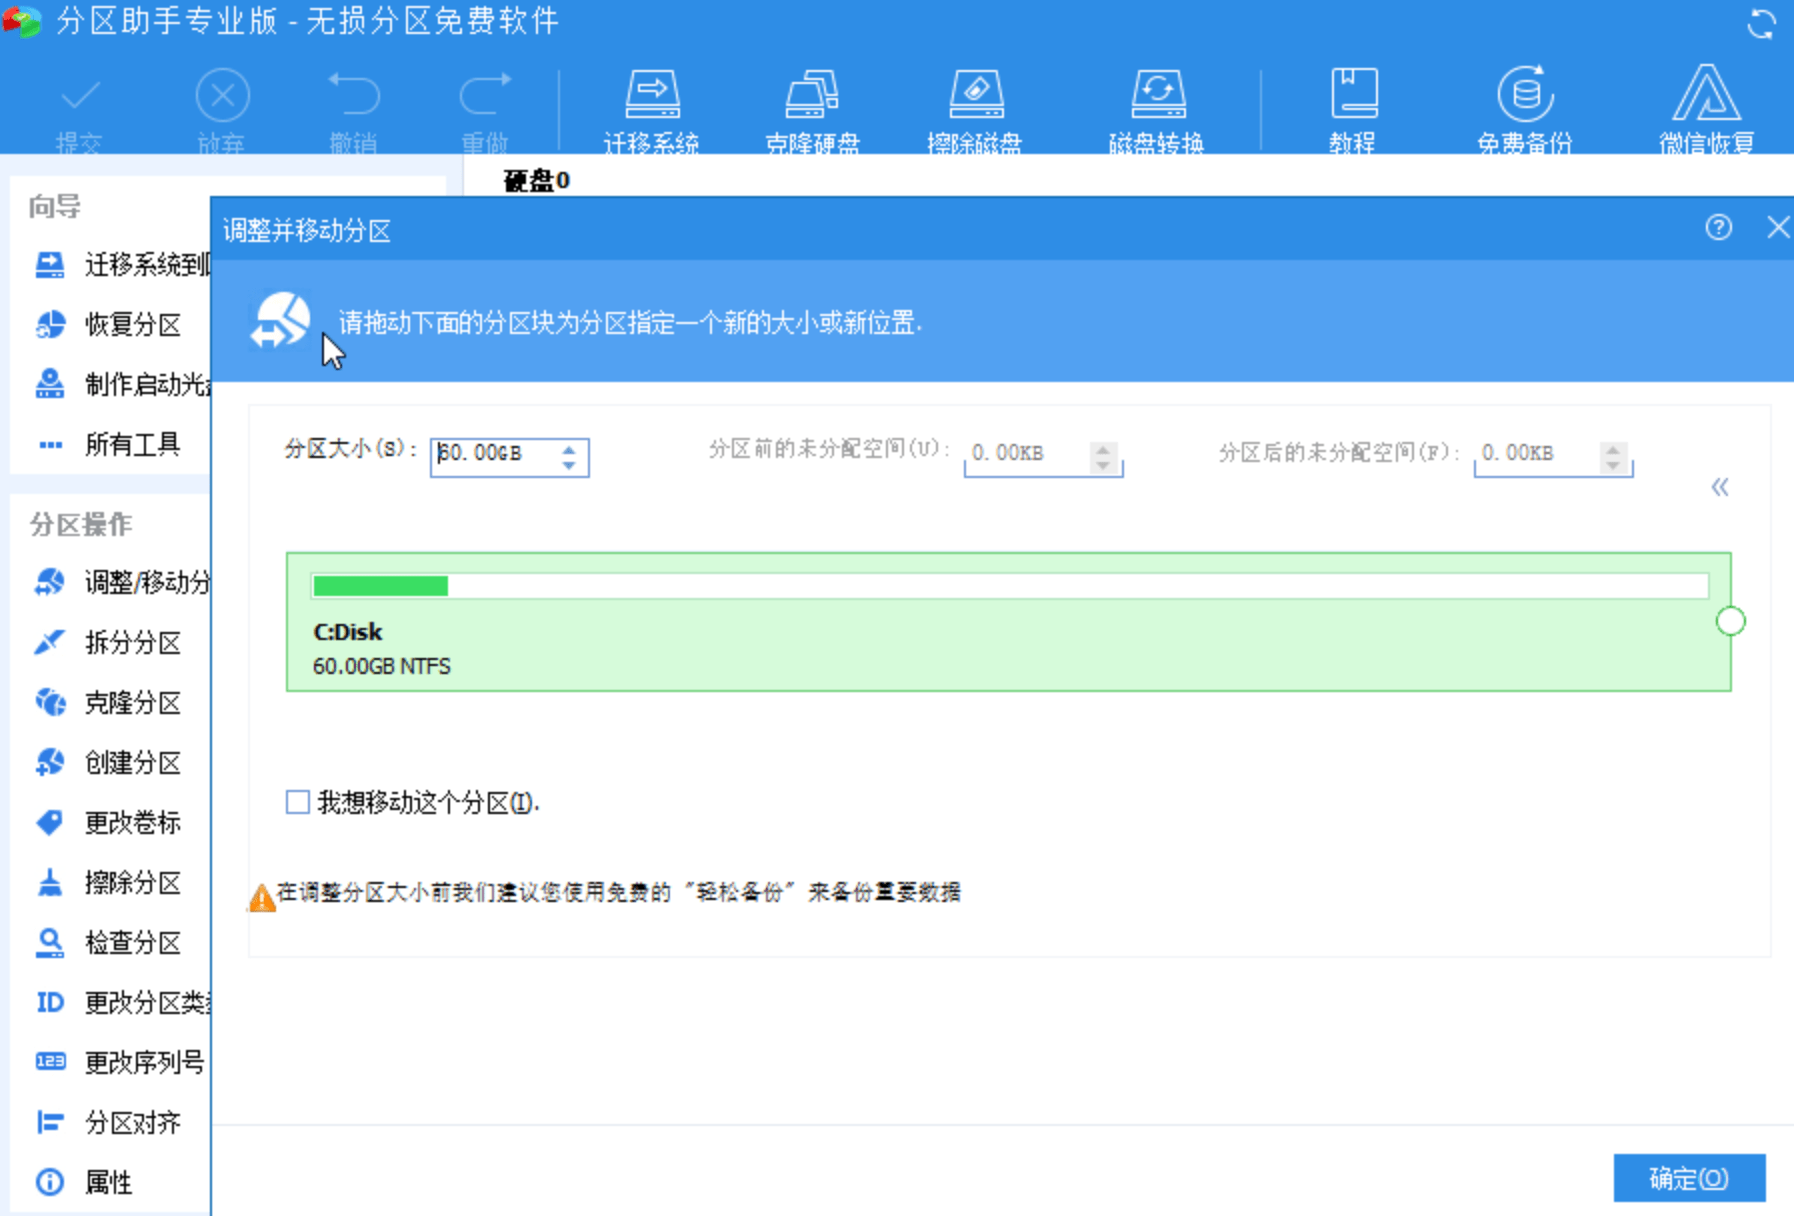
使用分区助手进行分区扩展
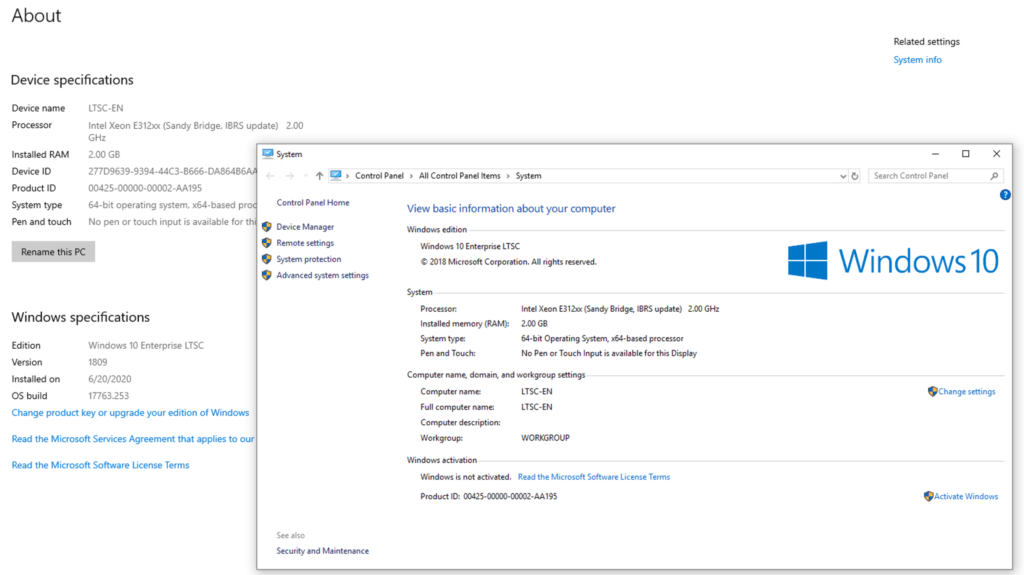
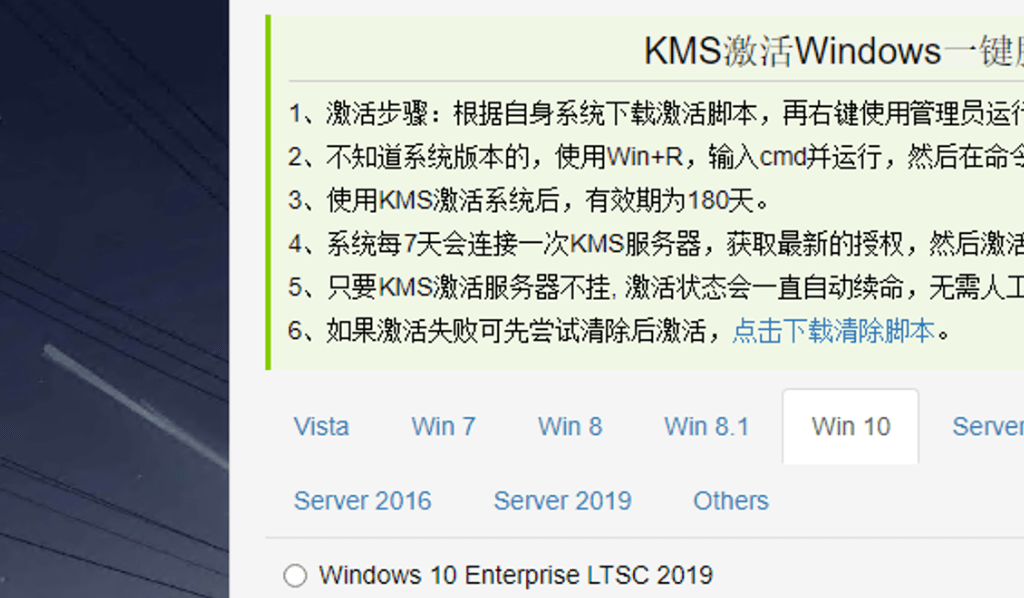
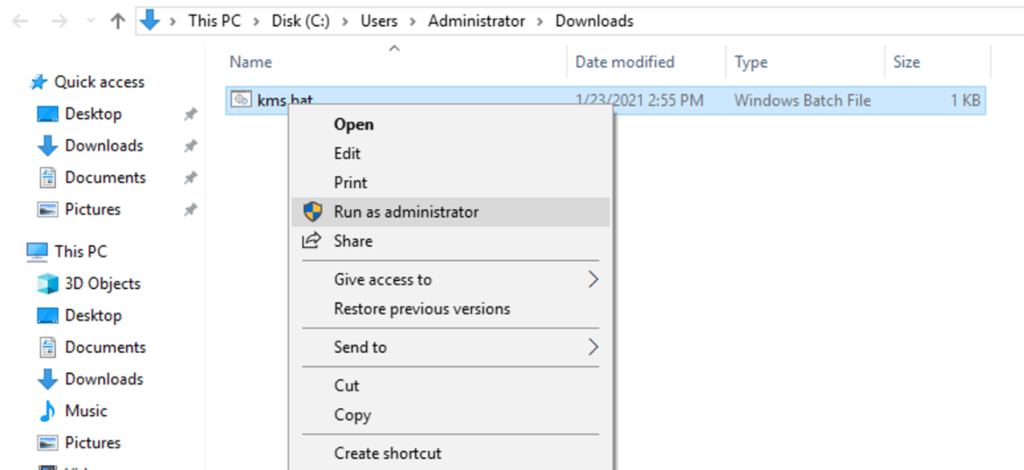
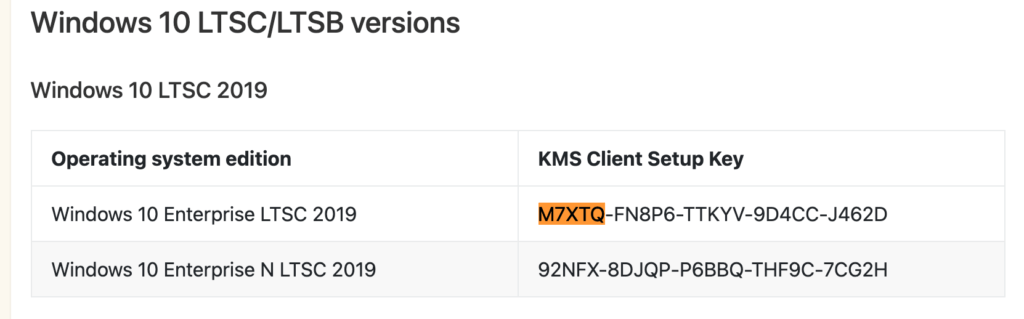
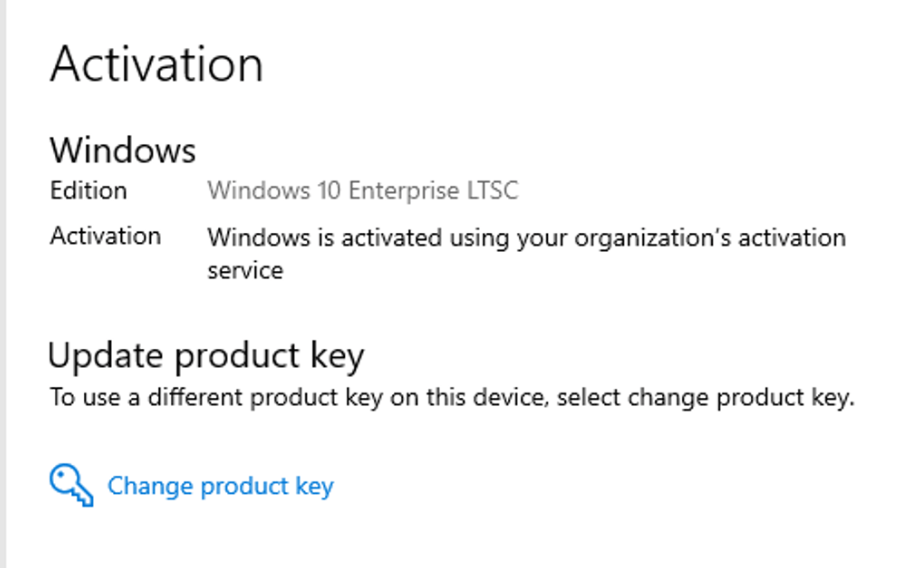
激活Windows
参考这个页面进行了kms激活 https://www.ievo.top/archives/69/
激活之前
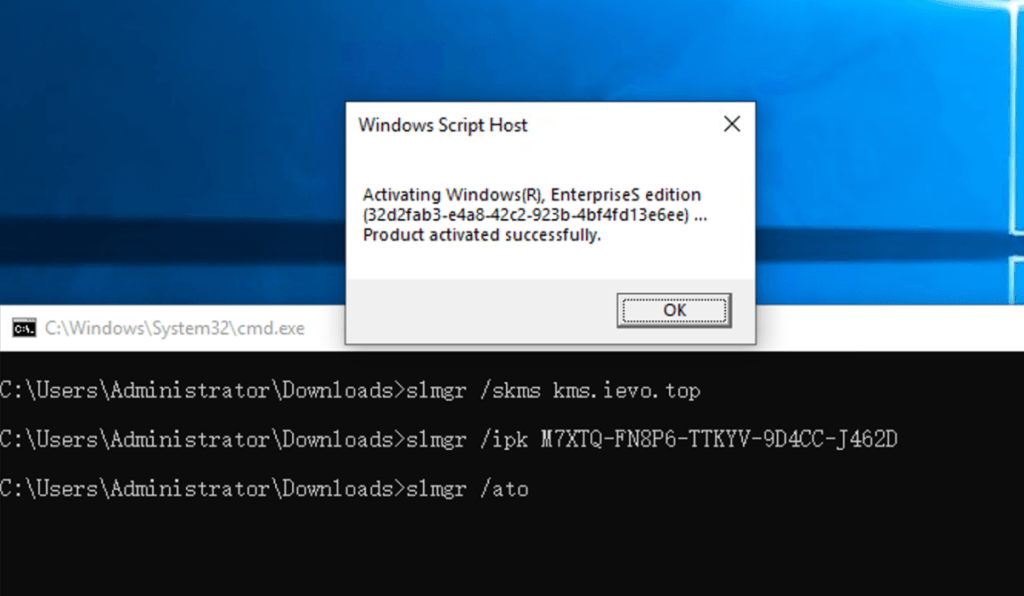
激活过程 – 上 kms.ievo.top 生成激活脚本
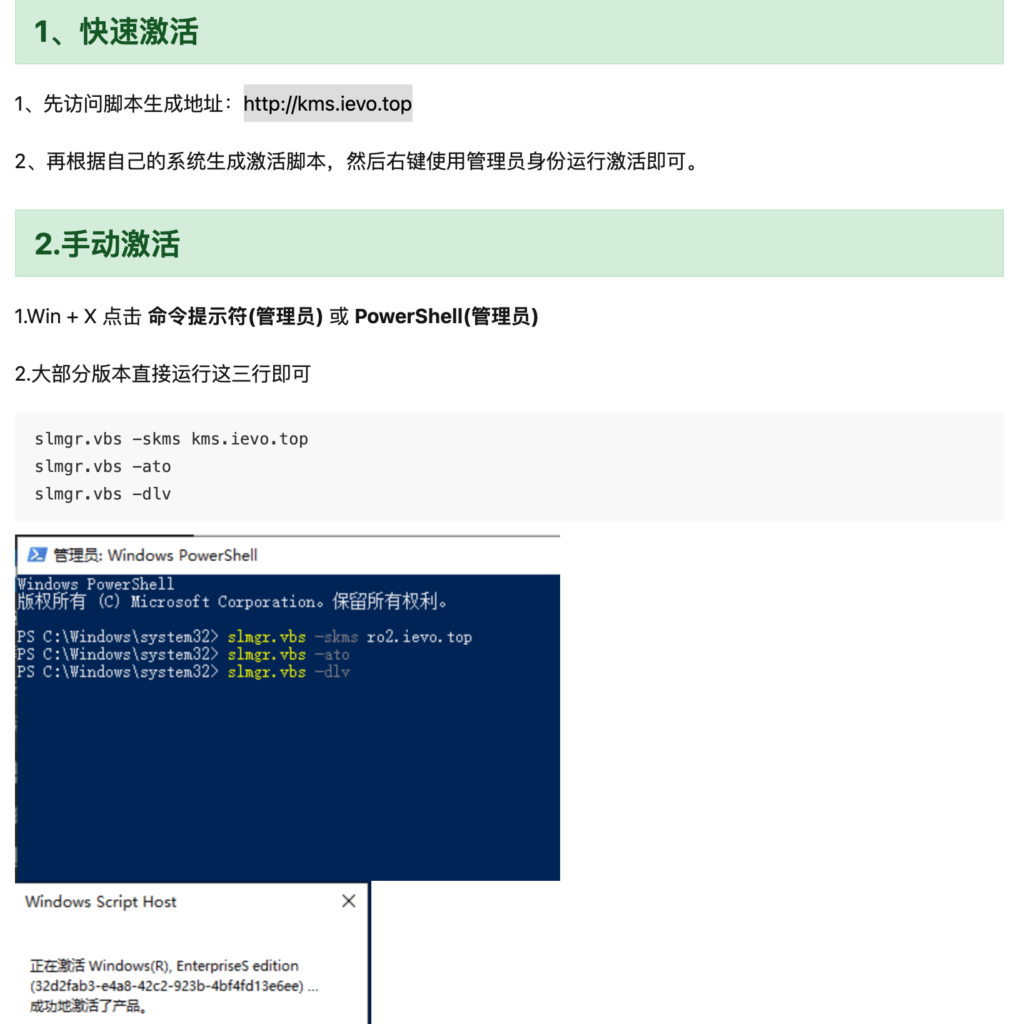
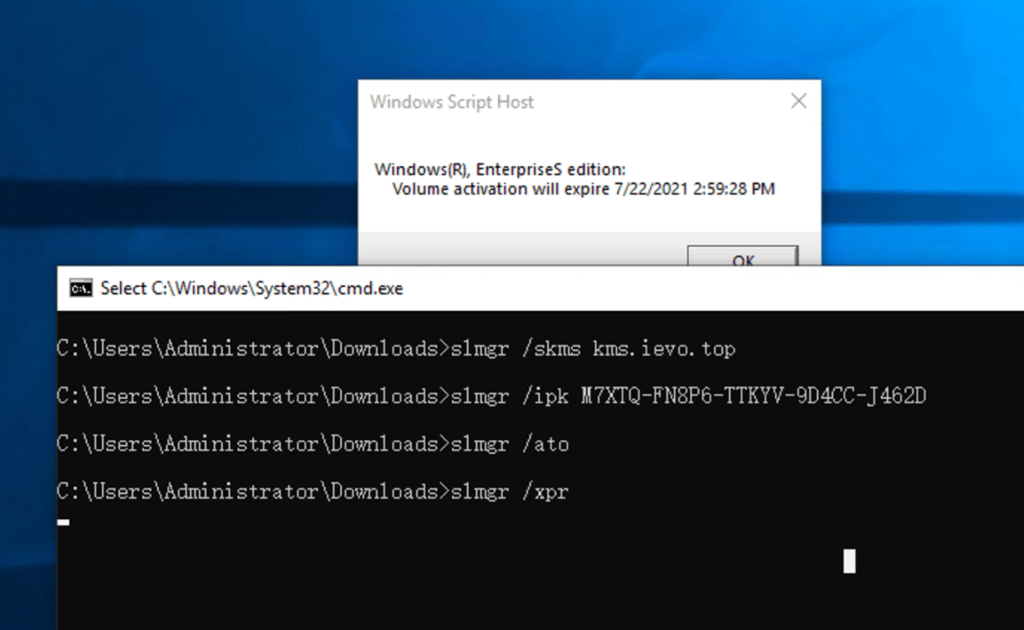
验证激活
取消激活,重来的话
slmgr /upk
slmgr /ckms
slmgr /rearm
其他的Windows镜像
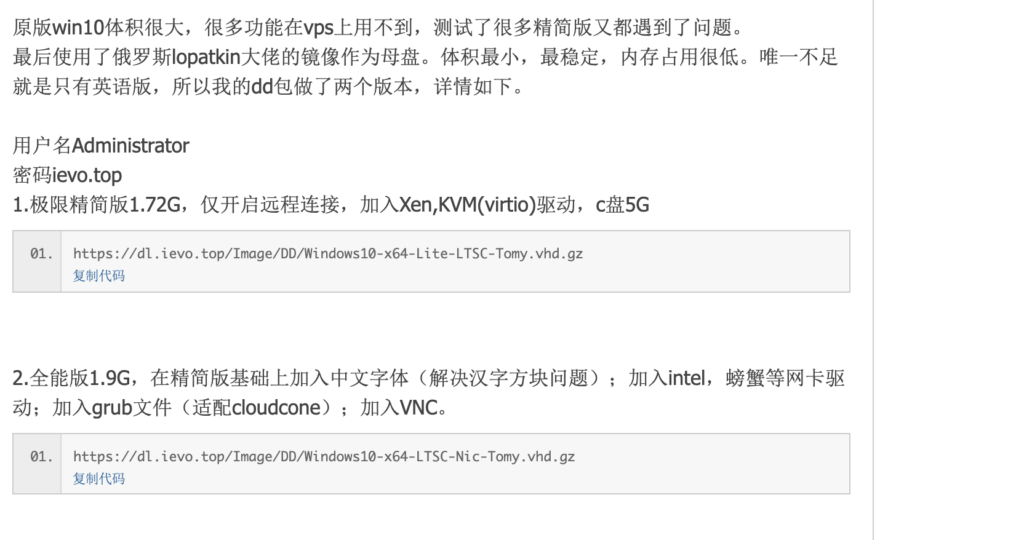
- https://dl.ievo.top/Image/DD/Windows10-x64-LTSC-Nic-Tomy.vhd.gz 用户名Administrator 密码ievo.top
- https://image.fucku.workers.dev/DD/Windows10-x64-Lite-LTSC-Tomy.vhd.gz 用户名Administrator 密码ievo.top
- https://image.fucku.workers.dev/DD/Windows7-x86-Lite-Tomy.vhd.gz 用户名Administrator 密码ievo.top