看波仔这个视频:
参考相应的博客
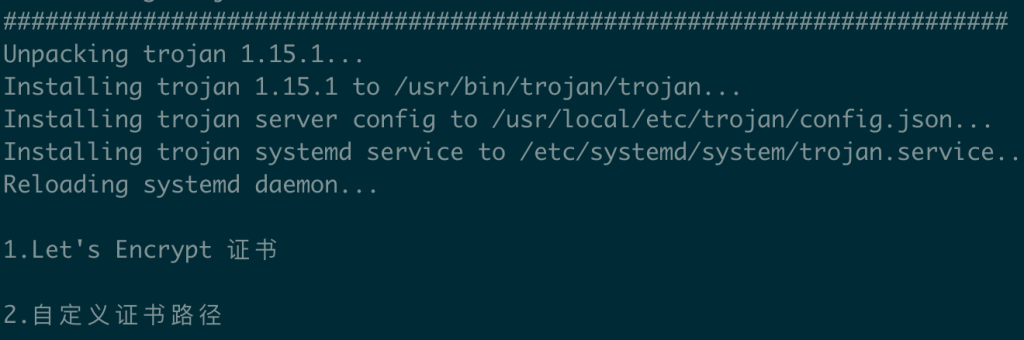
下载并运行
# 如果使用自己的证书,请提早准备好证书(比如fullchain.cer)和私钥(比如private.key)文件。
# 记得之前如果安装过其他的Nginx的话,要卸载,避免80/443端口被占用,不然证书申请不会成功
apt purge nginx nginx-common
apt autoremove
# 正式开始
source <(curl -sL https://git.io/trojan-install)

# 未来卸载
source <(curl -sL https://git.io/trojan-install) --remove
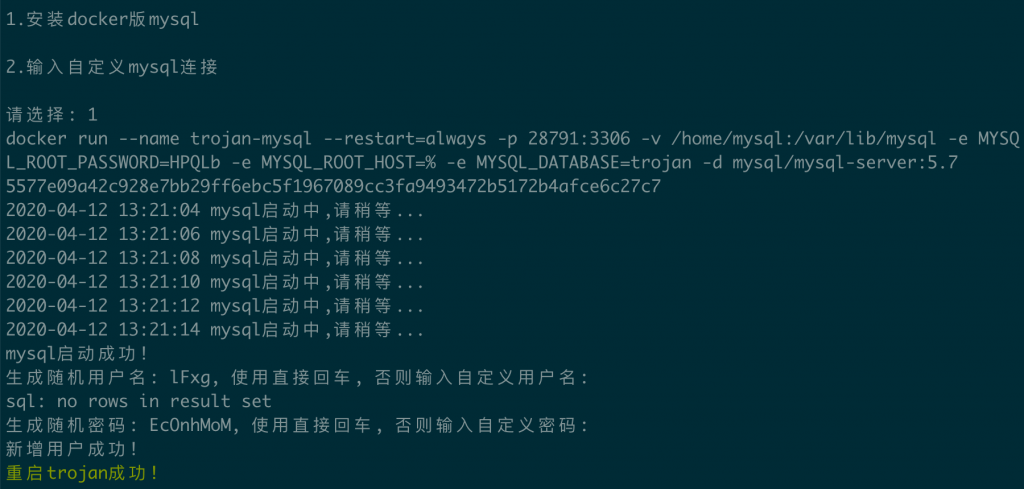
建议mysql用docker – 如果你以后要重用的话,要记住这个随机生成的root密码
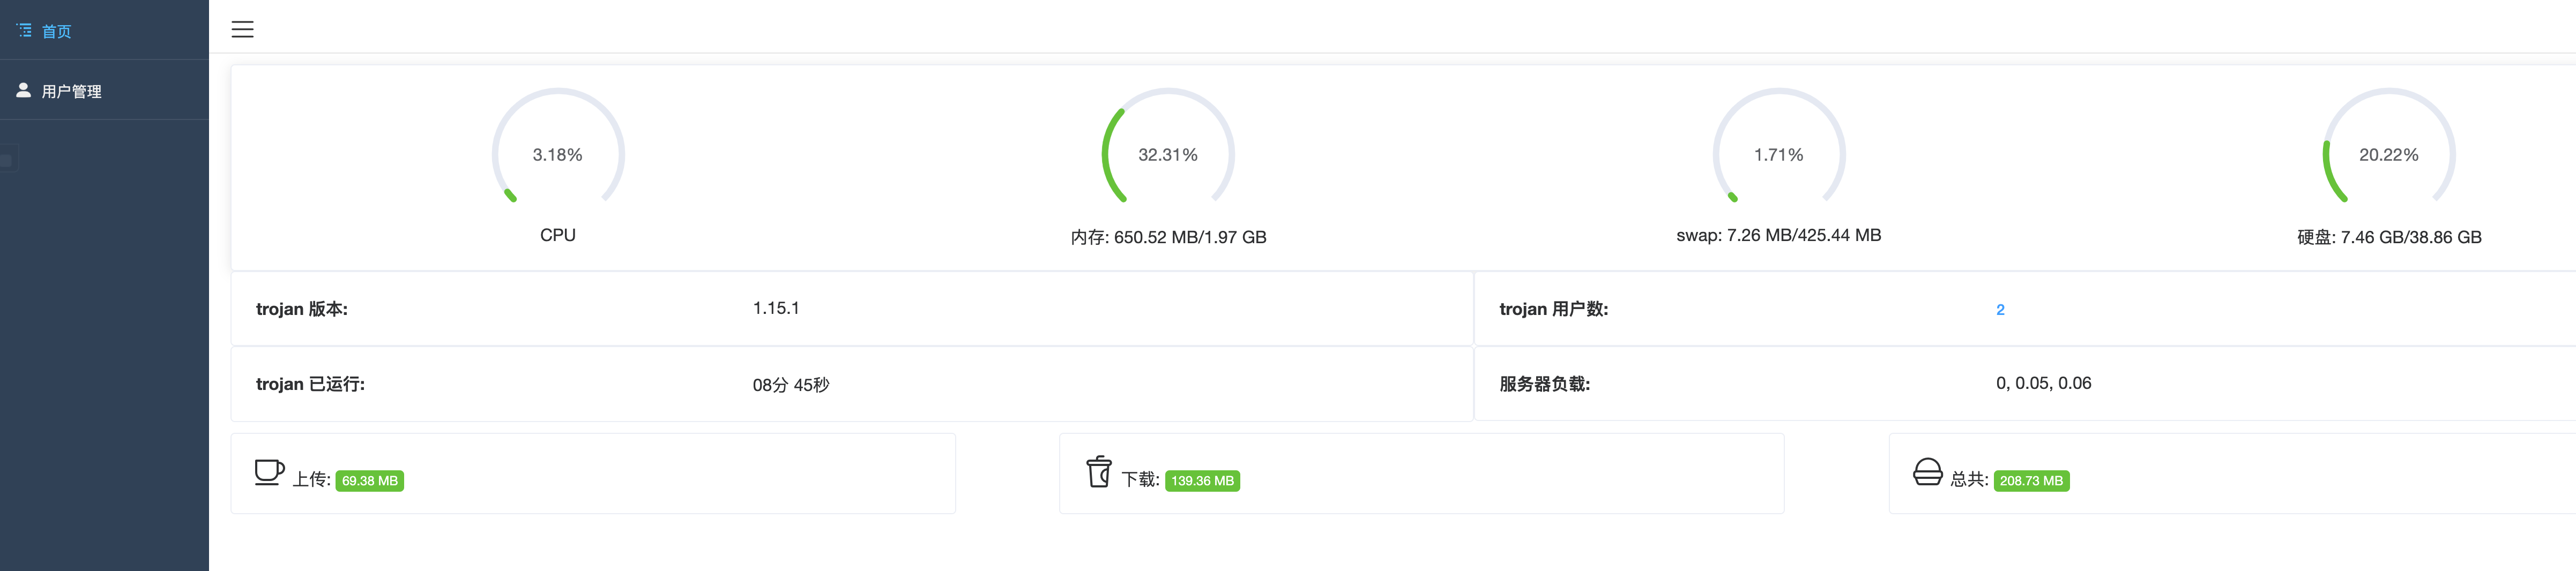
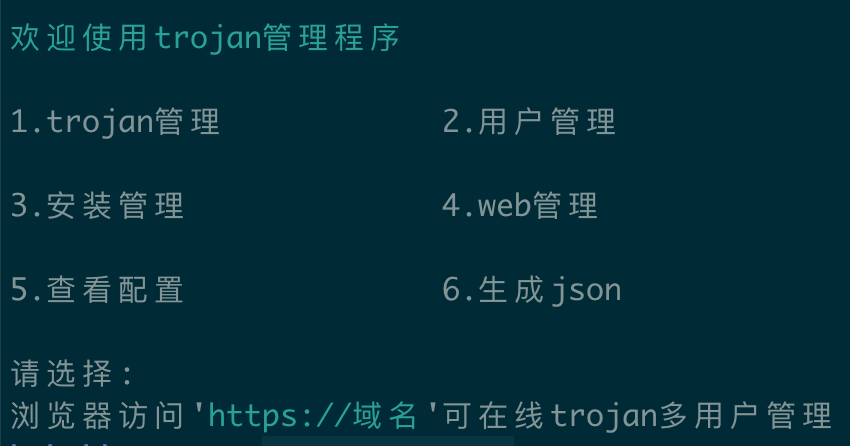
最后生成这个就成功了。在浏览器输入 https://your.domain就可以设置admin密码,并管理用户了。
使用自己已有的SSL证书,可以修改:

使用自定义的端口(不是443)-
CGroup: /system.slice/trojan.service
└─12886 /usr/bin/trojan/trojan /usr/local/etc/trojan/config.json