之前做过,但没有记录。这次再搞一遍。
主要参考的这篇 – https://www.v2rayssr.com/v2raybaota.html
内存不够,增加SWAP
这个机子只有1G内存,我把SWAP增加到了3G。具体方法本馆档案。
开启BBR
时间同步
rm -rf /etc/localtime
ln -s /usr/share/zoneinfo/Asia/Shanghai /etc/localtime
apt update -y && apt-get install ntp ntpdate -y
service ntpd stop                 #停止ntp服务
ntpdate us.pool.ntp.org           #同步ntp时间
service ntpd start                #启动ntp服务
安装宝塔
参考原始页面 – https://www.bt.cn/bbs/thread-19376-1-1.html
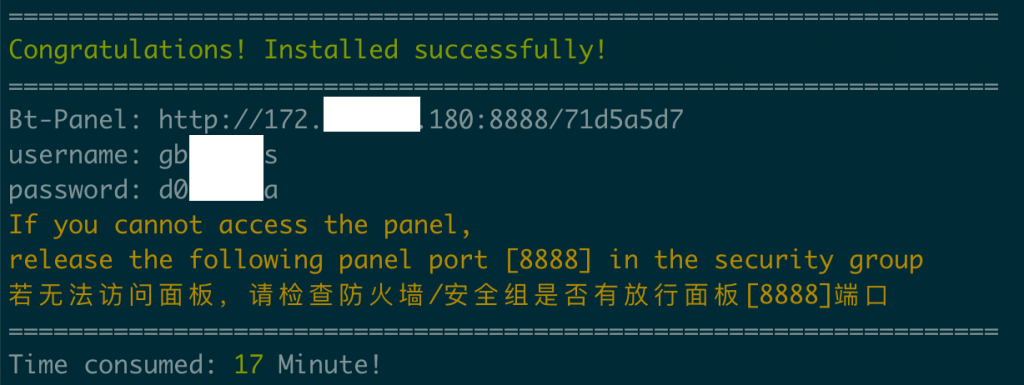
wget -O install.sh http://download.bt.cn/install/install-ubuntu_6.0.sh && bash install.sh
如果顺利完成,就会出现这样的结果
按提示登陆,会出现类似这样的界面;当时我忘了截屏,但这是我的选项
由于宝塔主要优化于Centos,对于Ubuntu,选择“编译安装”最为稳妥。

- nginx 1.18
- mysql 5.6
- php-7.3
- pureftpd-1.0
- pmyadmin-5.0
编译安装大概要1小时,安装成功后,最好做这些
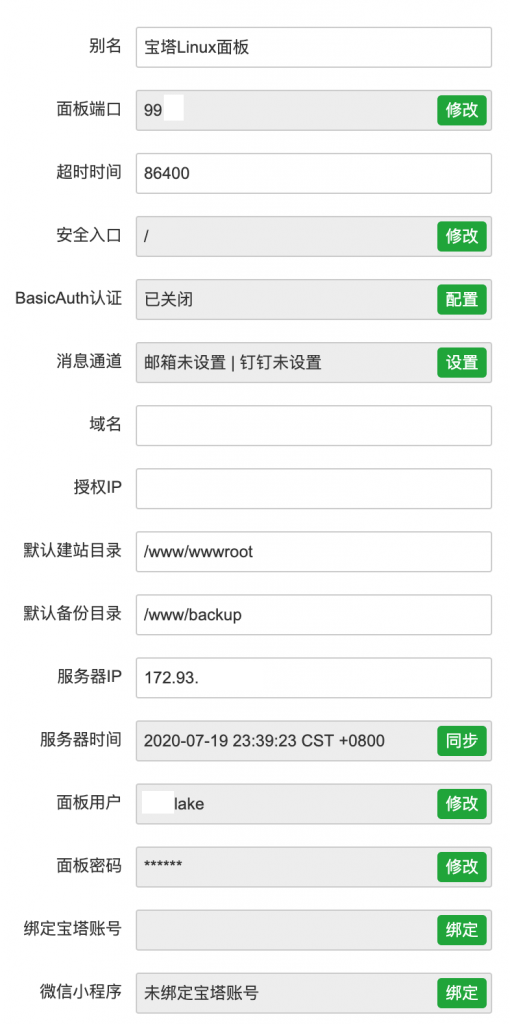
- 先放行新端口,然后改变面板端口
- 关闭安全入口
- 修改面板用户和面板密码
安装v2ray Docker – 参考 https://nine.im/V2Ray-Vmess-due-to-AEAD-14141863a706438abb749e2319191f4c
安装v2ray服务器:官方脚本
# check https://github.com/v2fly/fhs-install-v2ray
bash <(curl -L https://raw.githubusercontent.com/v2fly/fhs-install-v2ray/master/install-release.sh)


# 修改V2RAY服务器的配置文件如下:(下面代码可以直接覆盖源文件代码)
UUID=162dfc96-xxxx-49c03876398e
cat > /usr/local/etc/v2ray/config.json <<EOF
{
  //"log": {
  //"loglevel": "debug",
  //"access": "/etc/v2ray/access.log", // 这是 Linux 的路径
  //"error": "/etc/v2ray/error.log"
  //},
  "inbounds": [{
    "port": 65432,           //此处为安装时生成的端口,可修改随意,但是保证和下面提到的端口号相同
    "listen":"0.0.0.0", // if just accessed from local, can use 127.0.0.1
    "protocol": "vmess",
    "settings": {
      "clients": [
        {
          "id": "${UUID}", //此处为安装时生成的 id
          "alterId": 0      //此处为安装时生成的 alterId
        }
      ]
    },
    "streamSettings": {
      "network": "ws",
      "wsSettings": {
        "path": "/SoftDown"   //此处为路径,需要和下面 NGINX 上面的路径配置一样
      }
    }
  }],
  "outbounds": [{
    "protocol": "freedom",
    "settings": {}
  }],
  "routing": {
    "rules": [
      {
        "type": "field",
        "ip": ["geoip:private"],
        "outboundTag": "direct"
      }
    ]
  }
}
EOF

# 配置V2Ray的自动
systemctl daemon-reload
systemctl enable  v2ray
systemctl restart  v2ray
systemctl status  v2ray
签发SSL证书
先去CloudFlare上建立dns record. 再去宝塔开启SSL。可以打开“强制HTTPS”

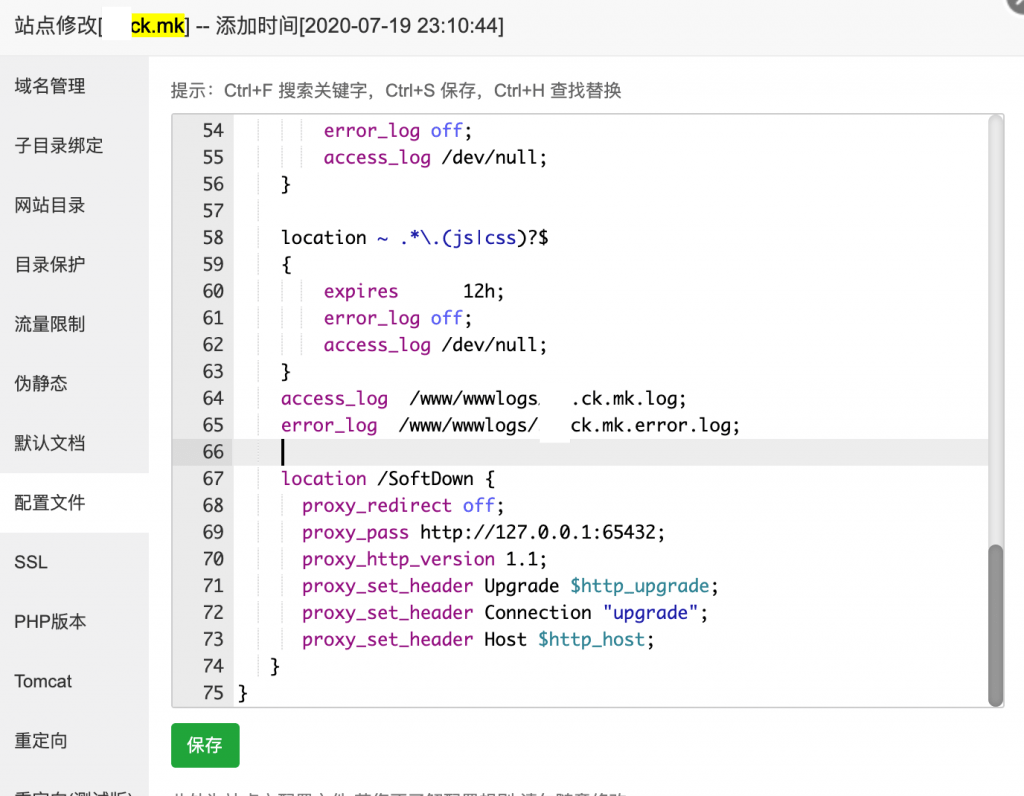
配置nginx for v2ray
location /SoftDown {
  proxy_redirect off;
  proxy_pass http://127.0.0.1:65432;
  proxy_http_version 1.1;
  proxy_set_header Upgrade $http_upgrade;
  proxy_set_header Connection "upgrade";
  proxy_set_header Host $http_host;
}
打开CloudFlare的CDN Proxy
这样就隐藏后面的IP,并利用CloudFlare的网络节点进行加速了

客户端配置
- name: "v2_jp_gcjp200g 绿云日本1T@1G 年付24刀 ***保留"
  type: vmess
  server: xx.ck.mk
  port: 443
  uuid: 162dfc96-自己的UUID-49c03876398e
  alterId: 64
  cipher: auto
  tls: true
  network: ws
  ws-path: /SoftDown
  Host: xx.ck.mk
  skip-cert-verify: true     #默认false
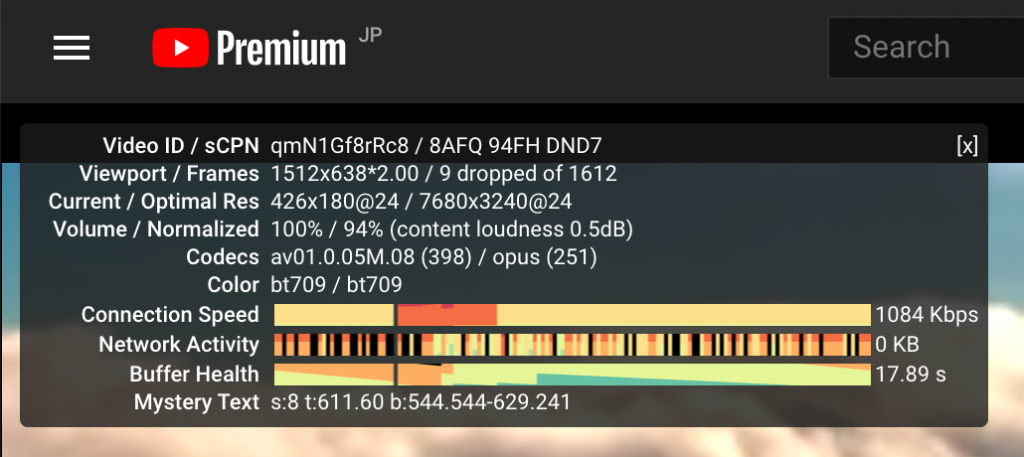
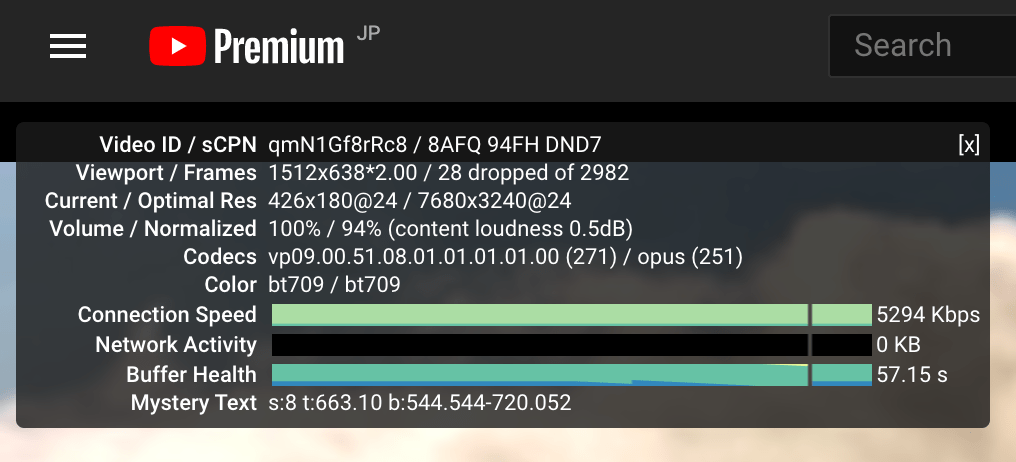
测速
直连 vs 打开CloudFlare CDN (2020_07_19 2330pm 上海)