
参考
宝塔添加网站并配置SSL
并设置好CloudFlare

下载
去这里看看 https://nextcloud.com/install/#instructions-server
# ssh over to host
# 安装过程有可能会break,用screen
screen -d -R nc

cd /www/wwwroot/xx.ck.mk
# 删掉现有的文件
rm *
wget https://download.nextcloud.com/server/releases/nextcloud-19.0.1.zip
unzip nextcloud-19.0.1.zip
mv nextcloud/* .
rm -rf nextcloud
设置目录权限

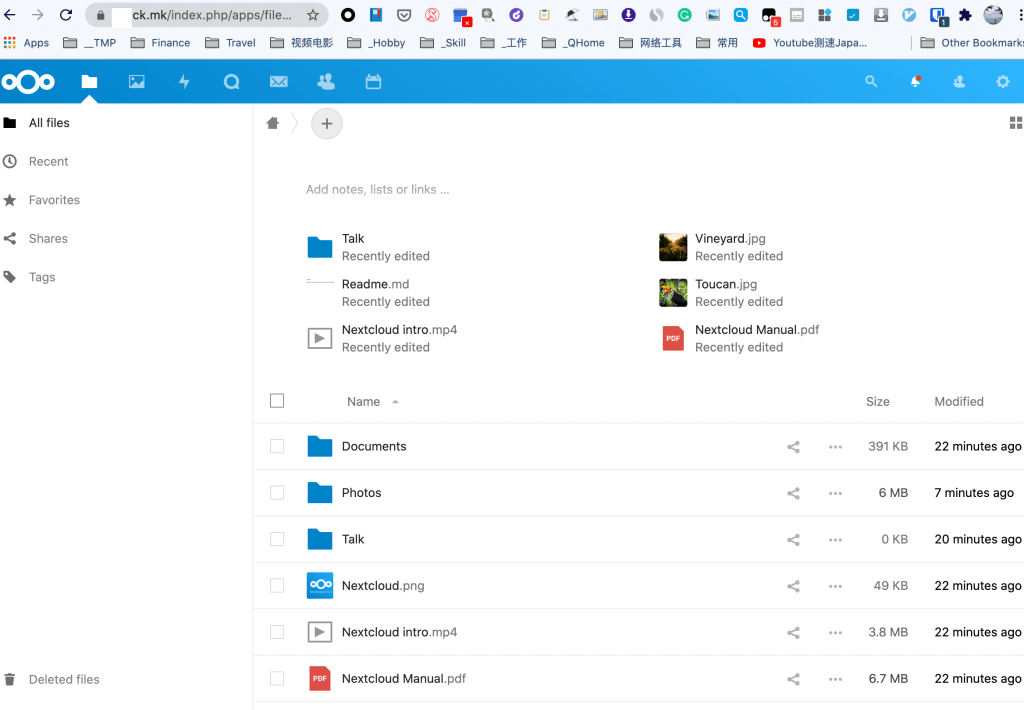
安装
打开 xx.ck.mk

将来会把这里的Data Folder下面的nc子目录symlink到Google Drive对应的目录
很快就安装完成。
修改data/nc目录映射到Google Drive
加载Google Drive到本地请参考本馆档案
# 之前已经加载了google drive到/data/nextcloud/data
ll /data/nextcloud/data
# lrwxrwxrwx 1 root root 45 Aug  8 12:11 /data/nextcloud/data -> /data/gd_stanford/_host/bwh229/nextcloud_data

# 为了更好的访问速度,决定只重定向./data/nc
cd /www/wwwroot/xx.ck.mk/data
# 别删,改个名;如果出错可以马上改回来
mv nc nc_old
ln -s /data/nextcloud/data/nc ./nc
cp -R nc_old/* ./nc/你还有可能看到“Open_basedir restriction in effect. File(…) is not within the allowed path(s)”之类的错误,那是因为这个/data/gd_stanford/_host/bwh229/nextcloud_data并没有在PHP允许访问的路径当中。修改如下:
cd /www/wwwroot/xx.ck.mk
# 允许.user.ini 可写
chattr -i .user.ini
echo ":/data/gd_stanford/_host/bwh229/nextcloud_data/" >> .user.ini
# 恢复不可写
chattr +i .user.ini
替换nginx 配置文件
upstream php-handler {
    #server 127.0.0.1:9000;
    # 根据你自己的PHP的位置,可查看(/www/server/php/74/etc/php-fpm.conf)
    server unix:/tmp/php-cgi-74.sock;
}

server
{
    listen 80;
	listen 443 ssl http2;
    server_name xx.ck.mk;
    index index.php index.html index.htm default.php default.htm default.html;
    root /www/wwwroot/xx.ck.mk;

    #SSL-START SSL相关配置,请勿删除或修改下一行带注释的404规则
    #error_page 404/404.html;
    #HTTP_TO_HTTPS_START
    if ($server_port !~ 443){
        rewrite ^(/.*)$ https://$host$1 permanent;
    }
    #HTTP_TO_HTTPS_END
    ssl_certificate    /www/server/panel/vhost/cert/xx.ck.mk/fullchain.pem;
    ssl_certificate_key    /www/server/panel/vhost/cert/xx.ck.mk/privkey.pem;
    ssl_protocols TLSv1.1 TLSv1.2 TLSv1.3;
    ssl_ciphers ECDHE-RSA-AES128-GCM-SHA256:HIGH:!aNULL:!MD5:!RC4:!DHE;
    ssl_prefer_server_ciphers on;
    ssl_session_cache shared:SSL:10m;
    ssl_session_timeout 10m;
    error_page 497  https://$host$request_uri;

    #SSL-END

    #ERROR-PAGE-START  错误页配置,可以注释、删除或修改
    #error_page 404 /404.html;
    #error_page 502 /502.html;
    #ERROR-PAGE-END

    #PHP-INFO-START  PHP引用配置,可以注释或修改
    include enable-php-74.conf;
    #PHP-INFO-END

    #REWRITE-START URL重写规则引用,修改后将导致面板设置的伪静态规则失效
    include /www/server/panel/vhost/rewrite/xx.ck.mk.conf;
    #REWRITE-END


    # Add headers to serve security related headers
    # Before enabling Strict-Transport-Security headers please read into this
    # topic first.
    # add_header Strict-Transport-Security "max-age=15768000;
    # includeSubDomains; preload;";
    add_header Strict-Transport-Security max-age=15768000;
    add_header X-Frame-Options 'SAMEORIGIN';
    add_header Referrer-Policy "no-referrer";

    #
    # WARNING: Only add the preload option once you read about
    # the consequences in https://hstspreload.org/. This option
    # will add the domain to a hardcoded list that is shipped
    # in all major browsers and getting removed from this list
    # could take several months.
    add_header X-Content-Type-Options nosniff;
    add_header X-XSS-Protection "1; mode=block";
    add_header X-Robots-Tag none;
    add_header X-Download-Options noopen;
    add_header X-Permitted-Cross-Domain-Policies none;

    # The following 2 rules are only needed for the user_webfinger app.
    # Uncomment it if you're planning to use this app.
    #rewrite ^/.well-known/host-meta /public.php?service=host-meta last;
    #rewrite ^/.well-known/host-meta.json /public.php?service=host-meta-json
    # last;

    location = /.well-known/carddav {
      return 301 $scheme://$host/remote.php/dav;
    }
    location = /.well-known/caldav {
      return 301 $scheme://$host/remote.php/dav;
    }

    # set max upload size
    client_max_body_size 512M;
    fastcgi_buffers 64 4K;

    # Enable gzip but do not remove ETag headers
    gzip on;
    gzip_vary on;
    gzip_comp_level 4;
    gzip_min_length 256;
    gzip_proxied expired no-cache no-store private no_last_modified no_etag auth;
    gzip_types application/atom+xml application/javascript application/json application/ld+json application/manifest+json application/rss+xml application/vnd.geo+json application/vnd.ms-fontobject application/x-font-ttf application/x-web-app-manifest+json application/xhtml+xml application/xml font/opentype image/bmp image/svg+xml image/x-icon text/cache-manifest text/css text/plain text/vcard text/vnd.rim.location.xloc text/vtt text/x-component text/x-cross-domain-policy;

    # Uncomment if your server is build with the ngx_pagespeed module
    # This module is currently not supported.
    #pagespeed off;

    location / {
        rewrite ^ /index.php$request_uri;
    }

    #一键申请SSL证书验证目录相关设置
    location ~ \.well-known{
        allow all;
    }

    location ~ ^/(?:build|tests|config|lib|3rdparty|templates|data)/ {
        deny all;
    }
    location ~ ^/(?:\.|autotest|occ|issue|indie|db_|console) {
        deny all;
    }

    location ~ ^/(?:index|remote|public|cron|core/ajax/update|status|ocs/v[12]|updater/.+|ocs-provider/.+)\.php(?:$|/) {
        fastcgi_split_path_info ^(.+?\.php)(/.*)$;
        include fastcgi_params;
        fastcgi_param SCRIPT_FILENAME $document_root$fastcgi_script_name;
        fastcgi_param PATH_INFO $fastcgi_path_info;
        fastcgi_param HTTPS on;
        #Avoid sending the security headers twice
        fastcgi_param modHeadersAvailable true;
        fastcgi_param front_controller_active true;
        fastcgi_pass php-handler;
        fastcgi_intercept_errors on;
        fastcgi_request_buffering off;
    }

    location ~ ^/(?:updater|ocs-provider)(?:$|/) {
        try_files $uri/ =404;
        index index.php;
    }

    # Adding the cache control header for js and css files
    # Make sure it is BELOW the PHP block
    location ~ \.(?:css|js|woff|svg|gif)$ {
        try_files $uri /index.php$request_uri;
        add_header Cache-Control "public, max-age=15778463";
        # Add headers to serve security related headers (It is intended to
        # have those duplicated to the ones above)
        # Before enabling Strict-Transport-Security headers please read into
        # this topic first.
        # add_header Strict-Transport-Security "max-age=15768000; includeSubDomains; preload;";
        #
        # WARNING: Only add the preload option once you read about
        # the consequences in https://hstspreload.org/. This option
        # will add the domain to a hardcoded list that is shipped
        # in all major browsers and getting removed from this list
        # could take several months.
        add_header X-Content-Type-Options nosniff;
        add_header X-XSS-Protection "1; mode=block";
        add_header X-Robots-Tag none;
        add_header X-Download-Options noopen;
        add_header X-Permitted-Cross-Domain-Policies none;
        # Optional: Don't log access to assets
        access_log off;
    }

    location ~ \.(?:png|html|ttf|ico|jpg|jpeg)$ {
        try_files $uri /index.php$request_uri;
        # Optional: Don't log access to other assets
        access_log off;
    }

    access_log  /www/wwwlogs/xx.ck.mk.log;
    error_log  /www/wwwlogs/xx.ck.mk.error.log;
}
设置NextCloud的Cron
crontab -u www -e
# 添加这一行;注意用你自己的路径
*/5  *  *  *  * */5  *  *  *  * php -f /www/wwwroot/xx.ck.mk/cron.php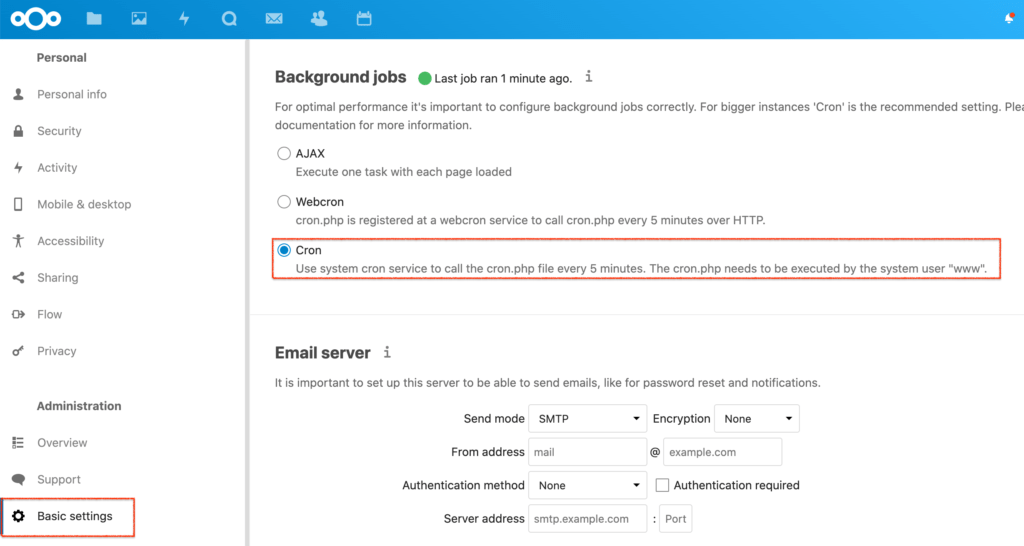
记得把CloudFlare Proxy打开
保护源IP

这样就OK了。
(可选)额外的优化
设置环境变量
# 根据你自己的php-fpm.conf的位置来定
echo 'env[PATH] = /usr/local/bin:/usr/bin:/bin:/usr/local/php/bin' >> /www/server/php/73/etc/php-fpm.conf
service php-fpm-74 restart
修改opcache的配置
;opcache
[Zend Opcache]
zend_extension=/www/server/php/73/lib/php/extensions/no-debug-non-zts-20180731/opcache.so
opcache.enable = 1
opcache.memory_consumption=128
opcache.interned_strings_buffer=8
opcache.max_accelerated_files=10000
opcache.revalidate_freq=60
opcache.fast_shutdown=1
opcache.enable_cli=1
opcache.save_comments=1
extension=memcached.so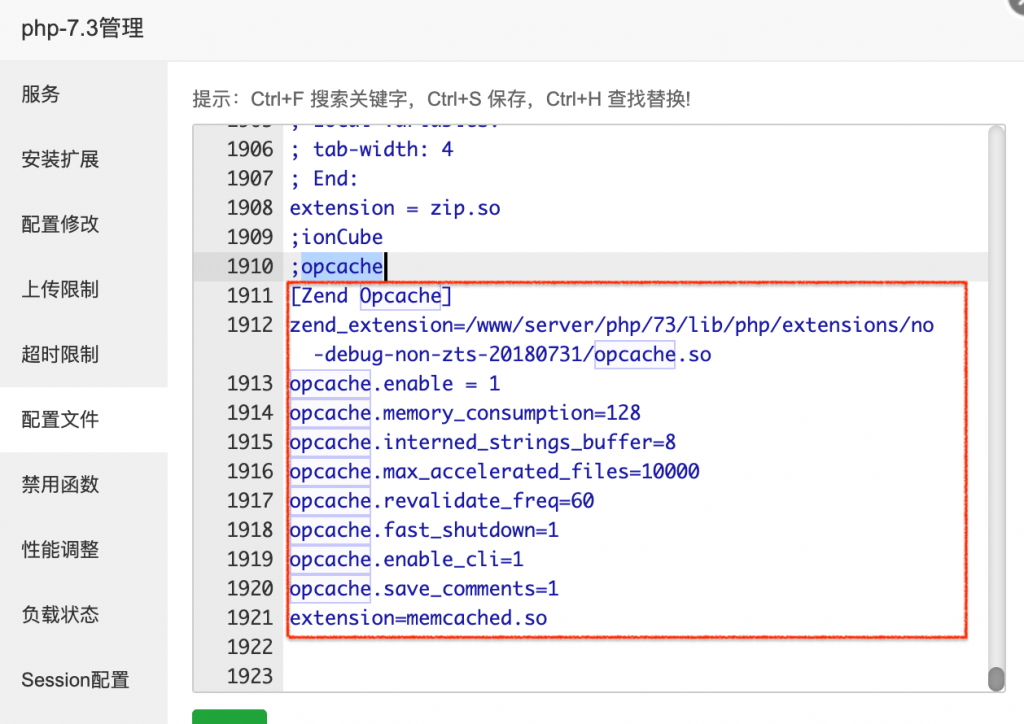
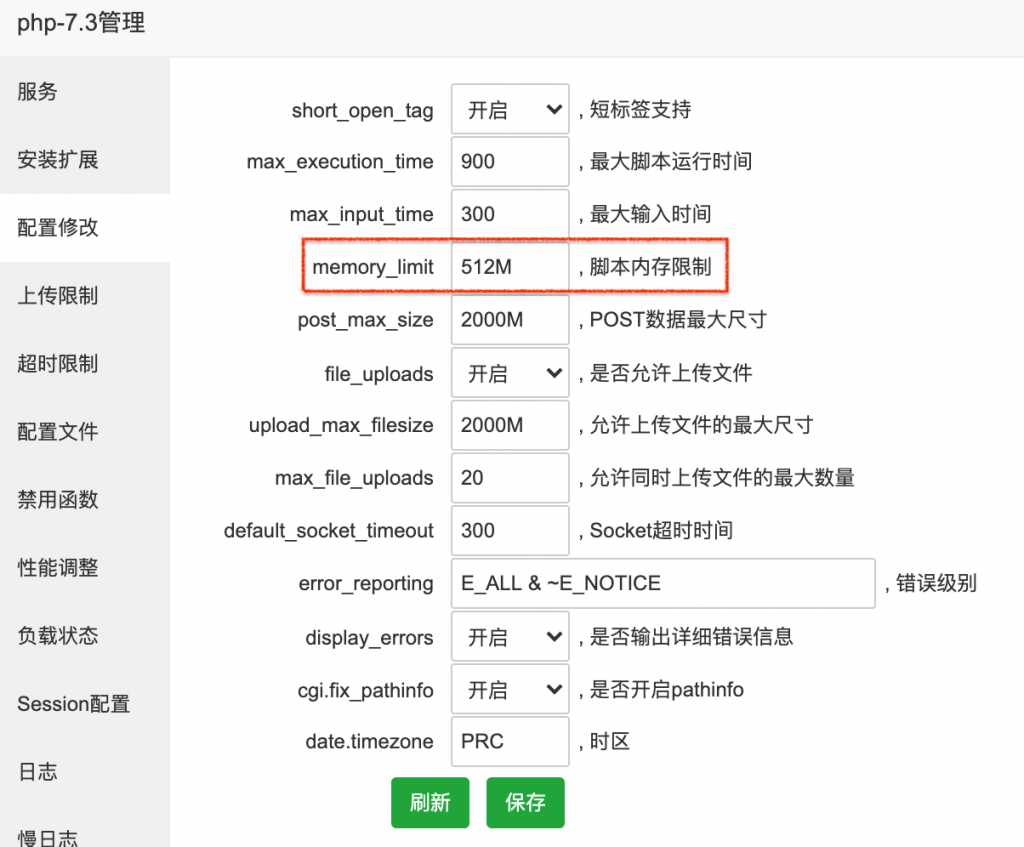
修改一些PHP设置,尤其是memory_limit
安装一些PHP扩展

这个imagemagick是最难安装的
参考 https://linuxconfig.org/how-to-install-imagemagick-7-on-ubuntu-18-04-linux
# 先修改
vim /etc/apt/sources.list

apt update -y && apt build-dep imagemagick
wget https://www.imagemagick.org/download/ImageMagick.tar.gz
tar xf ImageMagick.tar.gz
cd ImageMagick-7*

# 这一步需要花蛮长时间,我的花了半个多小时
./configure && make && make install

# link static libraries
ldconfig /usr/local/lib
# confirm the installed version
identify -version
# more in-depth installation check
make check

# 这一步之后,采取宝塔里面安装PHP的“安装扩展”。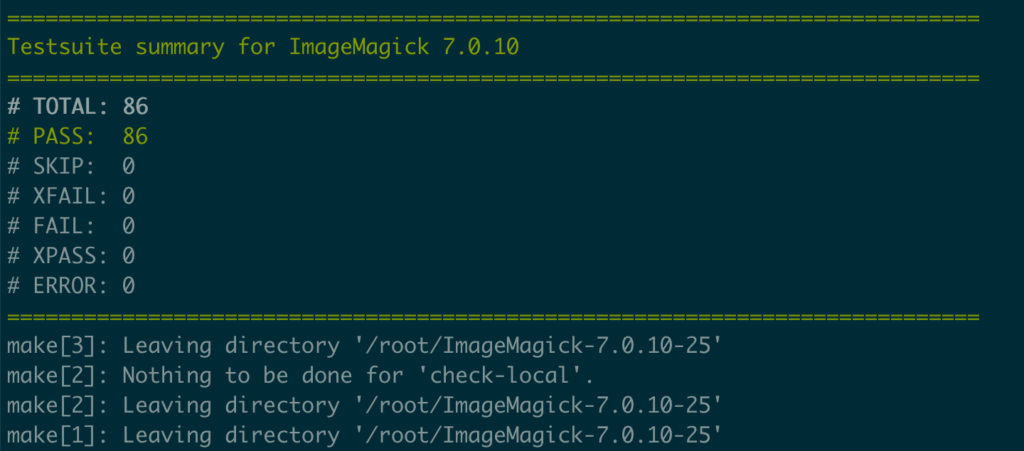
安装和配置APCU(本地数据缓存)在php.ini中
[apcu]
apc.enabled=1
apc.shm_size=128M
apc.enable_cli=1
安装Memcache
参考 https://docs.nextcloud.com/server/19/admin_manual/configuration_server/caching_configuration.html
vi /www/wwwroot/xx.ck.mk/config/config.php
# 添加下面的信息
'memcache.local' => '\OC\Memcache\APCu',
'memcache.distributed' => '\OC\Memcache\Memcached',
'memcached_servers' => [
     [ '127.0.0.1', 11211 ],
 ],
修改utf8 -> utf8mb4 (可以支持emoji)
先修改数据库
# 进入phpadmin
# database is set to use the Barracuda InnoDB file format:
SET GLOBAL innodb_file_format=Barracuda;
# check
show variables like 'innodb_file_format';
# 对于mysql 8.0之前的版本,在mysqld配置中加入
[mysqld]
innodb_large_prefix=true
innodb_file_format=barracuda
innodb_file_per_table=1

# 在terminal当中
cd /www/wwwroot/xx.ck.mk
www php occ maintenance:mode --on
# restart mysqld
# 在phpadmin中运行 ALTER DATABASE nc_ck_mk CHARACTER SET utf8mb4 COLLATE utf8mb4_general_ci;
sudo -u www php occ config:system:set mysql.utf8mb4 --type boolean --value="true"
sudo -u www php occ maintenance:repair
sudo -u www php occ maintenance:mode --off
“I am really inspired along with your writing abilities as well as with the format to your weblog.
Is this a paid theme or did you customize it your self? Anyway stay up the nice
quality writing, it is rare to peer a nice weblog
like this one today..”
“I am really inspired along with your writing abilities as well as with the format to your weblog.
Is this a paid theme or did you customize it your self? Anyway stay up the nice
quality writing, it is rare to peer a nice weblog
like this one today….
Fine way of describing, and pleasant piece of writing to get information concerning my presentation subject